Govern Standard Product Map

Govern Standard Product Map

Version 6.1

Overview

The following features are Govern User Interface standards available in the General User Interface or configurable in any Govern Module.


NOTE: The following information is displayed with arrows that expand and collapse the associated information. Click the arrow to selectively display or hide the relevant information. If you would like to display all content on the page, click “Show All“. Click “Hide All” to collapse the information.

Show All | Hide All

Standard Features (fea)

Read More...


Product Code Product Name Additional Information Notes
100-std-brules Standard To be or not to be Inactive Business Rules

Govern User Interface

101-std-fea-001 General User Interface (menu, buttons,windows, status bar)
101-std-fea-021 Keyboard Shortcuts
101-std-fea-030 Move previous and next on Parent Entity (CTRL) SHIFT F10, F11
101-std-fea-002 
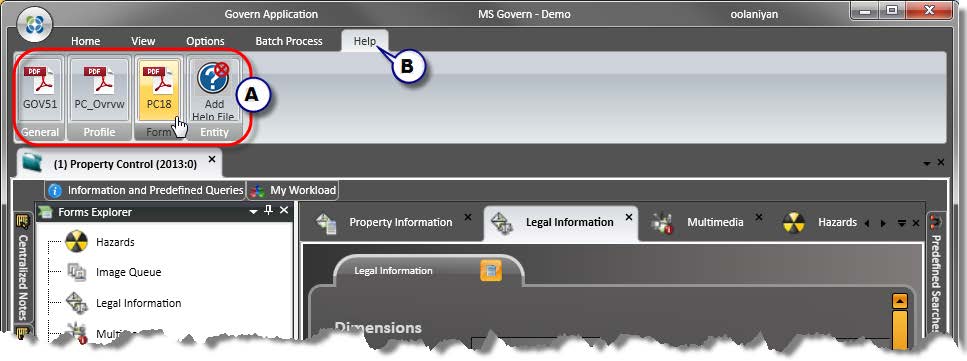
Help & Support (user help, how to, diag, error ..)
101-std-fea-003 Profile Queries (Coolbar)
101-std-fea-004-RibbonSearch Knowledge Base Search
Product Code

Govern Standard Features

Additional Information Notes
101-std-fea-015 Hibernate Feature
101-std-fea-008 Global Messaging Feature
101-std-fea-017 Business Entity Audit Trail
101-std-fea-013 Error Management and NLog (Trace Utility)
101-std-fea-019 Workload Manager Replaces My Workload (not supported in 5.1& 6.0)
101-std-fea-020 External Command Links
101-std-fea-041 Added Fields
101-std-fea-038 System Dictionary
101-std-fea-027 Govern Help / Online Help / Web Help
101-std-fea-040 User Key Dynamics
101-std-fea-048

MS Word Integration (Report Template)

Simplified reports using MS Word document as template
101-std-fea-050

NEW! Reporting – PDF

Create PDF Form documents with bookmarks and form fields that can be overwritten during process execution

Product Code

Govern Panels & Tool Boxes

Additional Information Notes
101-std-fea-004 e-Search (Dynamic Search) e-Search Technical Specification
101-std-fea-004-quicksearch Govern Quick Search using ElasticSearch™
101-std-fea-005 Treeview
101-std-fea-006 Saved Datasets
101-std-fea-007 History Time Line
101-std-fea-009 Central Notes
101-std-fea-010 Freeze and Audit Business Rules
101-std-fea-011 Roll Forward
101-std-fea-012 Profile – Reports (see OpenForms General Reporting ) See OpenForms Reporting
101-std-fea-014 Profile – Batch Programs See OpenForms Reporting
101-std-fea-047 NEW! Ribbon Search
101-std-fea-049 Dataset Treeview Temporary Records
101-std-fea-052 Subscription Notification Subscription notifications for changes made to sets of parcels.
Product Code

Standard Application Features

Additional Information Notes
101-std-fea-010 Freeze, Audit and Roll Forward Business Rules 101-std-fea-011
101-std-fea-016 Jurisdictions & Clusters – NOT USED in 6.1
101-std-fea-026 Copy to next Year
101-std-fea-037 Text Style Editor 101-std-fea-037-spec / 101-std-fea-037 Review Product Code
101-std-fea-046

Sequential Batch Process

Enhances batch process execution with sequential trigger

Product Code

Form Design Controls (Entity & Action Buttons)

Additional Information Notes
101-std-fea-029 Form Entity – Browse
101-std-fea-028 Form Entity – Record Selector (“AKA Mini-browse”)
101-std-fea-018 Form Action Button & Controller – Save & Search
101-std-fea-022 Form Action Button & Controller – Save Quick Search Review
101-std-fea-024 Form Controller – Generic Link to Function Custom Control With or Without delete option 101-std-fea-024-ofr
101-std-fea-023 Form Controller – Generic View Query Custom Control
101-std-fea-025 Form Controller – View Query see also – Add a Link in a Custom Control 101-std-fea-036
101-std-fea-036 Form Controller – View Query Add a Link in a Custom Control see also – View Query 101-std-fea-025
101-std-fea-033 List Control Box – Only other Container Controls, e.g. (Group box, Tab item and Grid) can be dropped onto.
101-std-fea-031 Form Action Button – Administrator Login 101-std-fea-031-ofr
101-std-fea-032 Form Action Button – Cash Register Action Button
101-std-fea-035 Form Action Button – Business Tax Transfer Filing
101-std-fea-042 Form Action Button – User Registry (UserRegistryAction) This standard action button can be added to forms to allow
the access to the user registry parameters to the users.
101-std-fea-043 Form Action Button – Send Email
101-std-fea-044 Form Action Button – Print a Report to be documented
101-std-fea-045 What-if Scenario Technical Documentation; see 101-std-fea-045
Product Code Accounts Receivable Standard Form Components Additional Information Notes
101-ar-fea-021 Form Controller – Payer Name Custom Control 101-are-fea-021-ofr (setup)
101-ar-fea-022 Form Action Button – Create A/R (Controller on save option) 101-ar-fea-022-ofr (setup)
101-ar-fea-024 Form Action Button – Create A/R Payment 101-are-fea-024-ofr (setup)
101-std-frm-025 Form Action Button – Export Reports using Crystal ReportsTM and MS WordTM templates


NOTE: Standard Features with module specific configuration are listed with the module (re, pp, mv…) under the same feature number. Ex: 101-std-fea-011 Roll Forward for Real Estate Tax = 101-re-fea-011


Standard Forms (frm)

Read More...


Page Link Description Additional Information
101-std-frm-001 Multimedia Control Configuration
101-std-frm-002 Workflow (deprecated in 6.1 – see 101-wm)
101-std-frm-003 Web Browser Integrator
101-std-frm-004 Activities
101-std-frm-005 Application Integrator (use with all)
101-std-frm-008 Application Integrator for MATIX
101-std-frm-010 Scanning Queue
101-std-frm-012 Summary Record Card

Batch Programs (bp)

Read More...


Page Link Process Description Release
101-std-bp-001 co_evalcalcflds Evaluate / Recompute Expressions 6.1
101-std-bp-002 co_comfmlogexp Compute Formula and Logical Expression 6.0 only
101-std-bp-003 co_executequery Batch Process – Execute Query
101-std-bp-004 co_exnamemail Batch Process – Export Name to Mail
101-std-bp-005 co_impnamemail Batch Process – Import Name to Mail roadmap
101-std-bp-006 co_noprocess Batch Process – Schedule Report
101-std-bp-007 co_testprocess Batch Process – Test Batch Processing Setup
101-std-bp-008 co_genlttr Batch Process – Generate Letter ACH and Coupon
101-std-bp-009 co_tmpl-email Batch Process – Generate Emails using the email template 6.1.1706
101-std-bp-010 co_quicksearch Batch Process – Quick Search Index Build 6.0.1803 / 6.1.1803
101-std-bp-011 co_emailstwebreg Batch Process – Email registration link to ST acct. w/o web access.
101-std-bp-012 co_genssrsgprpt Batch Process – Generate SSRS reports by group of parcels 6.0.1803 / 6.1.1803

Reports (rpt)

Read More...


Page Link Process Description Release
101-std-rpt-001 std-rpt-001 Batch Execution Result Report v1606
101-std-rpt-002 std-rpt-002 Batch Entity Audit Report v1609
101-std-rpt-003 std-rpt-003 GNA Parameters Audit Report v1609
101-std-rpt-038 std-rpt-038 System Data Dictionary Report (SY_DICT) v1609

Related Topics

Standard Feature List Page (101-std)

Reporting in OpenForms (100-reporting)


101-std-map


0 votes, average: 0.00 out of 50 votes, average: 0.00 out of 50 votes, average: 0.00 out of 50 votes, average: 0.00 out of 50 votes, average: 0.00 out of 5 (0 votes, average: 0.00 out of 5)
You need to be a registered member to rate this.
Loading...

101-std-wnew

Govern Standard and System Features – What’s New

Standard Features, Forms and Components

Email Template

[6.1.1706] – New Standard Feature

Send Email Batch Process

[6.1.1706] – New Batch Process to send emails using the Email Templatr

Workload Manager

  • [6.1.1706] – New Standard Feature (101-std-fea-019) The Workload Manager Standard Module Feature is designed to track activities regarding the Building, Health, Code Enforcement, Planning and Zoning departments’ application as well as the issuance of permits within the organization. This system also allows for an unlimited number of departments to track activities relevant to a parcel of land or the property records. For different Kinds and Categories of workflow, you are able to define all required steps to complete the process. You can define activities that can query other databases in order to apply business rules, and schedule automatic inspections.

Email Communication with Templates

Multimedia

  • [6.1.1706] – New Selected Multimedia Type parameter INSPECTION

Color Picker

  • [6.1.1706] The Color Picker Tool was added in SY REGISTRY. It is used to select the number format and the container color (i.e. PROD = Green, TRAINING = Blue and TEST = Orange)

Modal Form option (View Query Link)

  • [6.0.1611] It is now possible to open a form where the Current Govern Ids are not modified. For instance, linking to a Name form from the Corporate Account View Query would modify the current Govern Name ID.
  • [6.0.1611] A new parameter was added in the Generic Link Custom Control to open the form as Modal [OpenFormAsModal] and the new Modal option can be added in the View Query Custom Control [Link Modal Form] for instance, calling the Centralized Cash Collection form.
    • Note: The view queries should be revised and modified where applicable to add the Modal option to the Link command.

Global Messaging

  • [6.0.1703] Create Date and Create by User was added to the Global Message table (usr_message). Default message text can be added in the long description of the message type validation table. Global messages are predefined in the Message Type User Validation Table in GNA They can be updated or modified, as required for the situation, in Govern.

Adding Rich Text Format to Global Messages

  • [6.0.1703] You can now add Rich Text Format (RTF) to Global Messages. With RTF, you can change the font and font size; add numbers or bullets; add character formatting, such as, bold, italics, or underline; change the alignment to left, center, or right; and add highlights and color to your messages. For details on adding rich text format, click on the following link: Global Messaging

System Dictionary

  • [6.0] Automatic Creation of System Dictionary Entries: New Attributes will be created automatically in the table SY_DICT_DESC


Margins

  • [6.1] Can enter margins in OFD to improve and facilitate Form creation

View Query

  • [6.0] You can now add Links in the view query

History Tool Box

  • [6.0] Prior to 1606, except for Self-Reported Tax, the other modules that are not year base did not populate the History Tool Box. As of 1606, the Accounts or module details will appear.
  • [6.0] It is also possible to change the year by entering a year and clicking on the check-mark button.


External Command Editor

  • [6.1] It is now expression driven, and all external commands are now written as expressions. The seven combo boxes in the 6.0 version, for adding logical expressions, constants, formulas, etc., have been replaced by one, the Expression Selector.
  • [6.1] You can now view all the Profiles and user forms to which a selected command is added directly on the External Commands Editor in the Used In list box.

New Action Button for Forms – User Registry Editor

  • [6.0] This new standard button that can be added to most OpenForms. It provides the USER REGISTRY editor form LIMITED to the predefined Registry SECTION (KEY TYPE = USER ID) in the OpenForms Setup of the Action Button.Implemented in Cash Collection and GIS integration. See SY REGISTRY for more information.

Generic Link Controller

  • [1606] CO Generic Link Controller (Link to Names, Link to Parcels, etc.) without delete capabilities. The standard controller was changed to remove delete capabilities of the linked item for system integrity and a new controller was added with the Delete Capabilities. This was necessary since it some context, you do not want users to delete an existing link. Although security was applicable to the delete feature, it was changed to support system integrity business rules.
  • [1606] New properties
    • Allow Select Current ID
    • Alternate Attribute Name


Default Alignment on Text and Numeric Attributes

  • [6.0] By default, all numeric attributes are right aligned and all text attributes are left aligned. This alignment is defined by the Text Alignment field in the Govern OpenForms Designer (OFD).
    • Note: To implement the default right alignment on numeric fields on user forms, created prior to version 6.0.1511 or 6.1.1511, you need to open and save the forms in the Govern OpenForms Designer (OFD). If you override the default, your changes are overwritten when you perform an update or import a new version of the form.
      • The Text Alignment property is available for attributes only and is different from the Horizontal Alignment property.
      • The Text Alignment applies to the text only. The Horizontal and Vertical Alignment properties apply to the whole text box of the attribute.
    • General Alignment Information:
      • Any of the following text alignment properties can be selected for the text alignment of an attribute: left, right, center, or justify.
      • Any of the following can be selected for the Vertical Alignment of an attribute or most elements: top, bottom, center, or stretch.
      • Any of the following can be selected for the Horizontal Alignment of an attribute or most elements in the OFD: left, right, center, or stretch.

CTRL-F Search in OpenForms and Browse Data Grid

  • [6.0] The OpenForms search feature CTRL-F will now include the items in the Browse data grid pane.
    • If the item required is available within the OpenForm or in the Browse data grid pane, the Ctrl + F will locate it. The located result will be highlighted.
    • When there are multiple entries with the same search value, pressing enter repeatedly will cycle through all valid results.
    • See Main Browse [std-fea-029]

Wiki Help

  • [6.0] The Govern Wiki Help is a supplementary Help resource for the Govern suite of applications (Release 6.0 and 6.1).
    • Wiki Help is an alternate implementation of the end-user Online Help system for Administrators
    • Wiki Help is invoked with the standard F1 key. In some instances, as in the Govern application, the “Ctrl + F1” key combination is used.
    • see [std-fea-027]

CTRL-H Audit Trail

  • [6.0] The Audit Trail feature is used to track modifications to selected Govern tables, or functions. In previous versions of Govern, when configured, the audit trail created entries in (Table: USR_AUDIT_TRAIL).
    • Note: Modifications made to Govern Admin forms were saved to (Table: USR_AUDIT_ADM) and audited information relating to Govern Batch processes are saved to (Table: USR_AUDIT_BATCH).
    • In release 6.0 of Govern, the audit trail information is written to the following three (3) new tables: USR_AUDIT_OPENFORMS, USR_AUDIT_OPENFORMS_CHANGE, USR_AUDIT_OPENFORMS_KEY
    • See Database Changes
  • USR_AUDIT_OPENFORMS
    • AUDIT_ID
    • AUDIT_ACTION
    • ENTITY_ID
    • FORM_CODE
    • USER_ID
    • AUDIT_DATE
    • IP_ADDRESS
    • SOURCE_COMPUTER_NAME
    • REMOTE_COMPUTER_NAME
  • USR_AUDIT_OPENFORMS_CHANGE
    • AUDIT_ID
    • ATTRIBUTE_ID
    • TABLE_NAME
    • COLUMN_NAME
    • OLD_VALUE
    • NEW_VALUE
  • USR_AUDIT_OPENFORMS_KEY
    • AUDIT_ID
    • ATTRIBUTE_ID
    • KEY_NAME
    • KEY_VALUE
    • IS_PRIMARY_KEY
  • See [std-fea-017] for more information
  • Note: The legacy table USR_AUDIT_TRAIL will be kept for modules running in prior releases, but developers should note the new modifications and table structures for any impact to their processes.


Treeview and Parent Entity Move Next/Previous

  • New Standard Feature 030 to add parent entity move previous and next. (ex: Multiple Buildings Navigation in Building Structural Elements)
  • See [std-fea-030] for more information


Application Browser Integrator Form

New functionality to link to an external application with 2-way integration


101-std-wnew


0 votes, average: 0.00 out of 50 votes, average: 0.00 out of 50 votes, average: 0.00 out of 50 votes, average: 0.00 out of 50 votes, average: 0.00 out of 5 (0 votes, average: 0.00 out of 5)
You need to be a registered member to rate this.
Loading...

Govern Knowledge Base Help

Govern Help

Overview

What is Govern Help

The Govern Help is the term used to describe one or more technologies that are available for users of the Govern suite of applications. The Help system is an alternate implementation of the end-user Online Help found with Govern for Windows. In prior releases, Help came in the form of PDF files that required the installation of the Adobe AcrobatTM Reader.

Govern Help is invoked with the standard F1 key. This keystroke will invoke Govern Web Help. Web Help will display the contextual help information related to the feature or form within the Govern application. Govern Web Help displays help information through a Web browser. This browser must have access to the Govern Knowledge Base web site located at (http://kb.harrisgovern.com).

User Customized Help

In some instances, as in the case of the Govern application, there is a user configured Help feature. User configured help is initiated through the Ctrl + F1 key combination. When properly configured by the user, depending on the Govern application, Ctrl + F1 invokes the help document that has been configured by the user.

Availability

Unless otherwise stated, Govern Help is available in Release 6.0.1509 and Release 6.1.1509; the level of detail that will be provided to the user is found in the following grid.

NOTE: If Help information for the specific area of the application is not available, the top level information will be displayed by default.

Read More...

Govern Application Location Level of information
provide to user
Command Key
DeployEZ Help button (upper right hand side) or command key Top level – General application information F1
Govern New Administration (GNA) Help icon (in the ribbon under Help tab) Top level and select utilities and tools F1
Govern Security Manager (GSM) Ribbon (in the Help group) Top level – General application information F1
OpenForms Designer (OFD) Help button on ribbon Top level – General application information F1
Business Entity Designer (BED) Help button (upper right hand side) or command key Top level and application panes F1
Govern Help button under Help tab in the ribbon Top level – General application information Ctrl + F1 (F1 invokes PDF Help)
Govern Scheduler (GS) Help Menu (Help > Show Help) Top level – General application information F1
Query Tool (QT) Button on ribbon Top level – General application information F1

Troubleshooting

Although the requirements for Governs’ Web Help are basic, i.e. the installed Govern application and any one of the supported Web browsers, occasionally issues may arise. Resolution to some Web Help related issues will be listed below.

Access to the Knowledge Base

The most common error that is encountered with Govern Web Help is to ensure that you have an account to access the Govern Knowledge Base. If you do not have an access account, contact Govern Support.

Related Topics

R&D Developers – How to set-up new codes PRODUCT_RD 101-std-fea-027


101-std-fea-027


0 votes, average: 0.00 out of 50 votes, average: 0.00 out of 50 votes, average: 0.00 out of 50 votes, average: 0.00 out of 50 votes, average: 0.00 out of 5 (0 votes, average: 0.00 out of 5)
You need to be a registered member to rate this.
Loading...

Govern – Global Messaging

Global Messaging

Overview

The Global Messages group allows the creation of Global or Department messages that will be displayed when a selected record is accessed. Previously the messaging system was based upon a PARCEL ID (P_ID). This current implementation of the messaging system is based upon both the USERID and the Parcel ID (P_ID) for greater flexibility. For example in the Self Reported Tax (ST) module, a notice of delinquency message can now be sent to the account holder by associating the message with the USERID.

NOTE: This functionality replaces the Global or Department Flag.

Creating a Global Message

As described later on this page, you can create a Global Message for a group of parcels within a dataset

To create a Global Message:

  1. Launch Govern.
  2. Open the Profile that contains the forms to which the message is applicable..
  3. Select Home > Global Messages.
  4. Select the criteria for applying the message in the Link To section.
  5. Select a message type from the Message Type drop-down list.
  6. Compose the message.
  7. Click OK.

Details about the message including the User ID of the user who created the message and date the message was created are added to the USR_MESSAGE table.

Global Messages

  1. Click Global Messages to create and attach a message to a current record or dataset.

The message is created in the Global Message form. These messages can be assigned a priority and made private to a department or a primary key.

The Global Message form appears un-initialized, i.e. required fields have a red box around them (A).
As soon as an association is made with the message to a record or dataset, the red outlines disappear.

Adding Rich Text Format to Global Messages

You can now add Rich Text Format (RTF) to Global Messages. With RTF, you can change the font and font size; add numbers or bullets; add character formatting, such as, bold, italics, or underline; change the alignment to left, center, or right; and add highlights and color to your messages.

Global messages are predefined in the Message Type User Validation Table in GNA They can be updated or modified, as required for the situation, in Govern.

For details on adding rich text format, read the document available in the following link:

RichTextFormat.pdf

Global Message form parameters

Link to … group

NOTE: The title for this group will be dependent upon the Primary key that is selected for the message to be based upon; see Primary Keys below.

Active Dataset (pid)

Select this option to attach the message to the activedataset, i.e. the dataset obtained from the result of a search.

Saved Dataset

When a datset is saved, it can be accessed by selecting it from the drop down menu. The message will then be attached to the selected dataset.

Primary Keys

This option when selected will allow you to attach the message to one of the following Govern primary keys:

  • Parcel ID (P_ID) – Parcel identification number for the property
  • Name ID (NA_ID) – The Unique identification number of the current Name
  • Building ID (BLDG_ID) – Unique identification number of the current building.
  • User Key ID – This is the unique user key identification.
  • Year ID (YEAR_ID) – Year identification of the current record.

Private To…<department>

This option is used to specify that the current message is private to the selected department. Note that “<department>” is a variable that corresponds to the department that the user is registered to.

Global Message Viewer group and Priorities

Priority

Select from one of three (3) priority levels that can be assigned to the messages. Priority levels are as follows:

  • Low – Use this priority setting for low level messages that do not require immediate attention.
  • Normal – These are the day to day administrative notices that are not so critical that they would be assigned a high priority, but attention is required. An example of a normal priority message might be a note to inform users of a parcel that was recently split through a Split/Merge/Remap process.
  • High – These are the high priority/critical messages that require immediate attention. Examples might be a “Boil tap water notification”, or a “High heat notification”.

Message Types

This is an informational, user-definable field that is populated from the VT_USER.MSGTYPE table. Users can define options like, For Your Eyes Only, Immediate Attention Required, etc.

Options that are displayed in Message Type field will need to be defined by the user in (Table: VT_USER), MSGTYPE column.

Expiration Date

Enter the last day and time to display the message if required. This is useful for messages that need to be displayed for a set period of time only. Use the Date / Time Picker to specify the expiration date. With an expiration date, it will not be necessary to remove the messages manually.

Global Message – Message Composition Interface

The Global Message composition interface provides several formatting tools to add embellishments to the message. The message body supports Rich Text Format (RTF), as a result system typefaces and formats can be used on a message. In addition, images may be pasted in to the message through the Windows clipboard. This can be done by copying, Ctrl-C, the image from a graphics utility or program, and pasting, Ctrl-V, the image at the insertion point. The insertion point would be the location of the pointer.

Word Processing features

Users with Microsoft Word installed will have the advantage of the Real-time spelling checker available. As with Microsoft Word, a Red underline is used to highlight suspect words. Suspect words can be corrected with a right-click on the word to display suggestions.

Command Buttons

  • OK – Click OK to save or update the current message.
  • Cancel – Click Cancel to exit the form without saving your modifications.


Set Global or Department Messages

To set a Global or Department message…

  1. Perform a search for a record or dataset.
  2. Click Global Message on the Govern ribbon.
  3. At the appearance of the Global Message form, make a selection of the required options; select the Active Dataset option to apply the message to the current dataset.
  4. When a dataset has been saved, it can be selected from the Saved Dataset drop down menu.
  5. Select a Primary Key from the Primary Keys drop down menu. See Primary Keys.
  6. If the message is to be private to a department, select the Private To… option.
NOTE: The PrivateTo <Department>, displays the <Department> that the user is set up for

  1. In the Global Message Viewer group, specify the message Priority, the Message Type, and if required, an Expiration Date.
  2. In the message body area, enter the message and format with the available tools. Note that images can be inserted through the Windows Clipboard.
  3. Click OK to accept the message.


Global Message Behavior

Records or datasets that have messages attached to them, when accessed and depending on set options, will display a Global Messages screen containing a preview of any messages that are related to the record or dataset. The system provides indicators that inform users of messages, i.e. Global Messages form (A), and Notification Flags (B). The Govern status bar along the bottom of the application window displays a notification icon in the lower right hand corner. In addition notifications are also temporarily displayed in the Lower right hand side of the Govern application window. The following two Message Notification (2) icons can be displayed in the status bar:

NOTE: When messages are displayed, depending on the number of messages, it is recommended that the
Status Bar Message Indicator Icons
  • No Message(s) – This indicator when displayed in the tray is an indication that there are no messages attached to the currently active record or dataset. A right click on this icon in the tray will display the following menu option:
  • Create a New Message – Use this option to create a new message.
  • Message(s) waiting – This indicator when displayed in the tray is an indication that there are messages attached to the currently active record or dataset. Depending on the setting of the behavior setting of the User Registry A right click on this icon in the tray will give two menu options:
  • Create a New Message – Use this option to create a new message.
  • Tell Me Again – Select this option to repeat the display of the messages.
NOTE: Messages will not be displayed again if notifications have been disabled in the User Registry form. See Global Messages and the User Registry below.

The manner in which the messages are displayed are user definable through the User Registry form.

TIP: A double click on the Message indicator icon will force the display of the Global Messages form and all related messages. Use the Filter by Priority options to control the messages that are displayed.

User Registry Settings

As indicated above, the behavior of Global Message notifications can be controlled in the User Registry. The Registry Manager form, offers users the ability to control how notifications are presented.

Registry Manager Options for Global Messages

The following user registry keys are the options that are used to control the presentation of notifications. The User Registry Manager form is accessed through the Govern application interface.

To access the User Registry Manager…

  1. In the Govern interface select the Govern Suite button (1) > Options (2).
  2. In the Registry Manager form, make the required selections.

Displaying Notifications

Notifications are displayed in the form of flags that are displayed in the lower right hand corner of the Govern application window. These flags are displayed briefly, i.e. 2-3 seconds, and fade away. This method of display is to catch the users attention. If a notification is missed, they can be displayed again through the Tell Me Again option in the status bar notification icon. See Status Bar Message Indicator Icons.

Notification Flag for High priority Messages

Select this option to display only High Priority messages as notification flags.

Notification Flag for Normal priority Messages

This option should be selected to display Normal or higher Priority messages as notification flags.

Notification Flag for Low priority Messages

When selected, this option will display Low or higher Priority messages as notification flags.

NOTE: Selecting this option is the same as selecting an option to display notification flags of messages of all priorities in the Global Messages form.

Flag to automatically open High priority Messages
This option, when selected, will display only High Priority messages in the Global Messages form.

Flag to automatically open Normal priority Messages

This option, when selected, will display only Normal or higher Priority messages in the Global Messages form.

Flag to automatically open Low priority Messages

This option, when selected, will display Low or higher Priority messages in the Global Messages form.

NOTE: Selecting this option is the same as selecting an option to display messages of all priorities in the Global Messages form.

For a better understanding of how priorities associated with messages are displayed, refer to Global Message Viewer group and Priorities.

Global Messages form

Selecting a record with a message attached to it will invoke the Global Messages window. This window is divided into two (2) principal sections, the Filter by Priority group (A), and the Active Messages area (B).

NOTE: When there are multiple messages, they will be displayed sequentially below the Filter by Priority group; it may be necessary to scroll through a list of messages.

Filter by Priority
The Filter by Priority group allows users to control which messages are displayed based upon the message priority setting.

  • High Priority – When this option is selected, only messages set with a High Priority are displayed.
  • Normal Priority – Select this option to display only messages with a priority of Normal Priority or higher, i.e. Normal and High Priority messages.
  • Low Priority – If this option is selected, all messages with a priority of Low or higher will be displayed; select this option to display all messages

Message Preview

Messages that are displayed in the Global Messages windows are displayed in a preview mode that displays the first two lines of the message that is appended with the words [Double-Click to see more] (A).
To display the expanded message…

  1. Place you mouse pointer over the message area and double-click in the area to expand the message.
  2. A second double-click on the message will return it to the two line preview mode.

Editing an existing message

When a message is displayed, with sufficient permissions, the message can be edited.

To edit an existing message…

  1. In the Global Messages preview form, there is an Edit Message button; click Edit Message to display the full Global Message form.
  2. Make any required changes to the message; e.g. Priority, Expiration Date, etc.
  3. Click Save to accept the change(s).

Securing Global Messages with the GSM

As with similar Govern features, the Global Message system has a component that is administered through the Govern Security Manager (GSM).

Security Rules

The Global Message (A) system is secured at two (2) levels:

  • System-wide, i.e. messages that are directed to all users of the Govern system.
  • By Department; these are messages that are localized to a specific department.

Each of the above levels has an additional level of security that is associated with it. These message types can be further qualified as Global, or Private.

  • Global – A Global Message…
  • Private – Messages that are specified as Private…

For details regarding the configuring of these options, refer to the Govern Security Manager (GSM).


101-std-fea-008


0 votes, average: 0.00 out of 50 votes, average: 0.00 out of 50 votes, average: 0.00 out of 50 votes, average: 0.00 out of 50 votes, average: 0.00 out of 5 (0 votes, average: 0.00 out of 5)
You need to be a registered member to rate this.
Loading...

Govern Standard Batch Programs

Govern Standard Module – Batch Processes

Overview

Batch processes are used to calculate and update multiple records at the same time, to post records to the General Ledger accounts, to delete records that are not posted, to apply pending amounts and penalties, to extract or compute amounts for a specific date, and to close a fiscal period or year. This page provides general information on batch processes that applies to all modules.

Prerequisites

  • Each batch process must be defined in GNA, Batch Process Editor.
  • It must be linked to a Profile and accessed through a Profile.
  • Access permissions must be provided by role and user.

Accessing the Batch Processes

To access a batch process:

  1. Launch Govern.
  2. Select Batch Process in the View menu if the Batch Processes explorer is not displayed.
  3. Open the Batch Processes explorer.
  4. Select the process that you want to view.
  5. Running Batch Processes
  6. Open the batch process and enter the optional and required information, such as selecting a deposit number or numbers, entering a range of dates or tax map numbers, selecting a department, subsystem, and cycle code. You can do any of the following:
  • Execute or run the process immediately.
  • Schedule the process to run at a later date or on a recurring basis, at regular intervals, such as daily, weekly, hourly, etc.
  • Create and save a schedule for a batch process. Then, deselect the Activate button until you are ready to put the schedule into place. Select Activate when you are ready to run the process at regular intervals.

For further details about running and scheduling batch processes, refer to the Govern Scheduler documentation.

General Guidelines

This section provides a few rules and tips about batch processes.

Optional Fields

If a field is optional, you can enter the required criteria or leave it blank to process all records that meet the other criteria on the form. For example, if a date field if optional, leave it blank to process records from all dates.

Fiscal Year

The Fiscal Year displayed in the Home menu in Govern Ribbon is not applicable to the batch processes. When the fiscal year is required for the batch process, you need to enter it on the batch process form. On some batch processes, you may need to enter an effective year or entry year as well as the fiscal year.

Posted Records

When you run the Account Receivable batch processes, records are saved to the following tables: AR_MASTER, A/R_SUMMARY, and AR_DETAIL.

Once A/R records are posted, they cannot be modified or deleted. Therefore, it is important to verify all records before posting them.

Deposit Management

Deposit Management is integrated with Accounts Receivable in Govern OpenForms. All Payment Data Entry transactions require a deposit number. Depending on the setup in GNA, the deposit numbers can be automatically-generated or you can create them manually in the Deposit Management form.

Viewing Reports and Verifying the Status of Batch Processes

When you run a batch processes in Govern, the status of the process is indicated by the progress bar. Green indicates success, yellow a warning, and red an error. Information, warning, and error messages are displayed below the bar.

If you click on a message, you can view it in a message box.

You can also click on the Copy button and copy all messages to a separate file.

Viewing Reports and Attachments

Reports and attachments can be linked to a batch process in GNA. For example, a csv file, containing information about accounts with an overdue balance, could be generated at the end of a batch process. A report could be generated as a pdf.

If a report or attachment has been generated by the batch process, you can view it by clicking the icon that appears beside the progress bar when the process is successfully completed.

NOTE: You can also view reports generated from scheduled batch processes in the Govern Scheduler. Refer to the Govern Scheduler documentation for details.


To view a report or attachment:

  1. Launch Govern and run the batch process.
  2. When the process is complete, a message is displayed on the progress bar in the Batch Processes Explorer.
  3. An attachment icon is displayed in the list box under the Progress Bar.
  4. Click on the Attachment icon .
  5. The report or attachment opens in the application in which it was created.

See Also

Govern Batch Scheduler and Installing the Batch Scheduler Service
General Batch Process OpenForms Standards (100-batchprocess)


101-std-fea-014


0 votes, average: 0.00 out of 50 votes, average: 0.00 out of 50 votes, average: 0.00 out of 50 votes, average: 0.00 out of 50 votes, average: 0.00 out of 5 (0 votes, average: 0.00 out of 5)
You need to be a registered member to rate this.
Loading...

Govern Standard Module Configuration

Govern Standard Module Configuration

Overview


101-std-config


0 votes, average: 0.00 out of 50 votes, average: 0.00 out of 50 votes, average: 0.00 out of 50 votes, average: 0.00 out of 50 votes, average: 0.00 out of 5 (0 votes, average: 0.00 out of 5)
You need to be a registered member to rate this.
Loading...

Govern Help Documentation

Govern Help

Overview

Installation of the Govern Help system is managed by the Deploy EZ application during the installation or update process. It is during this process that required directories are created and help content is updated. For the Govern application, unlike the Help system of the other applications in the suite, Govern help content is not invoked with the F1 key. Help content is displayed with a click on one of the help icons (A) displayed under the Help tab (B) in the Govern application interface. The user selects the icon that corresponds to the profile, form, or entity of interest.

NOTE: Users can still invoke Help content with the F1 key in all other applications within the Govern suite. All help content that is presented to the user is contextual, i.e. relevant to the active user screen.


Read More...

User Interface

Govern

For a user to open the Help file within the Govern application, they will need to select the Help tab in the ribbon of the Govern application (A). Under the ribbon, the help content which corresponds to the Application, the Profile, the displayed Open Form, and the Entity is displayed (B).

  • Applications – Content corresponding to the suite Application; the General group
  • Profile – Help content for the Profile
  • Form – The help content for the displayed Open Form
  • Entity – Help content related to the Entity
  • Report – This is the Report associated with the form or entity.

The Help button displays information for the main application, and the OpenForm Help will display Help content that is related to the active OpenForm.

Missing / Unavailable Help Content

When content is not present the broken help link icon is displayed. This icon is an indication that there is an issue with accessing the Help file(s). Issues can be anything from the files not being present or incorrect directory structure due to a change in the Open Forms General Settings form in GNA; the Help Folder Structure Type parameter may have been changed.To correct this situation, users will need to either:

  • Place the required content in the appropriate directory

OR

  • Verify that the Help Folder Structure Type parameter setting in the Open Forms General Settings form in GNA is set to the correct Help folder structure.


Help Content Directory Structure

Open Form Hierarchy

The Open Forms hierarchy is as follows with order of precedence decreasing from left to right.
The above hierarchy is reflected in the structure of the Help directories and subdirectories.

Order of Precedence for Help files Directories

When a user calls the help file, the Govern system first checks in the Custom folder. If the requested file is not found, it will default to the Standard folder to display the file. The Custom folder is reserved for users that want to generate their own custom PDF help files.

Directory Structure

As illustrated in the grid illustration, the structure of the Help directory is multi-leveled. The <HELP ROOT> refers to the root level of the help directory, and not the actual deployment installation of the Deploy EZ application.

Grid illustration examples:

  • Standard (same level option)
    • The versionNum directory will be a version number, i.e. 5.1, 5.2, 6.0,…
  • Custom (same level option)
    • The structure for the Custom directory is nearly identical to that of the Standard directory.
    • The exception is that the Version directory is not present at Level 1. All sub-directories are shifted up by one level.
  • Custom (profile option)
    • Different profiles will require the same report. When the Profile option is selected in the System Registry, the different profiles will be using the same report.Copies of the same report are placed in the different Profile directory.
101-std-fea-002-GOV60-(UI HelpStruct-StdDir-SameLvl)-[v6.0].png
STANDARD – SAME LEVEL option


101-std-fea-002-GOV60-(UI HelpStruct-CustDir-SameLvl)-[v6.0].png
CUSTOM – SAME LEVEL option


101-std-fea-002-GOV60-(UI HelpStruct-CustDir-ProflOptn)-[v6.0].png
CUSTOM – PROFILE option

Click the diagram to enlarge and open in a new window

Setup

GNA – System Registry (xxx)

Default folders & options

The directory structure, as in previous releases, has two (2) principal subdirectories, Standard, and Custom. Both the Standard and Custom directory structures are set by the system and should not be modified by the user. The structure, and how the system will access the Custom directory can be determined by the user through settings in the Govern New Administration (GNA). There are two (2) options to choose from in the form. [to be verified]

To open the form, in the GNA, select System Parameters > General Settings Editor…
In the Open Forms General Settings editor, select the following:

  1. Under the Registry Filter, select General.
  2. Locate the General Section Name, available options are Profile or Same Level.
  3. The selection of Profile or Same Level, are dependent upon user requirements.


Same Level option

Users that are content with the Property Control (PC) profile that is the system default should use the Same Level option. The same profile will be used by all departments, i.e. the same Open Forms will be accessible to all users. All users will be viewing the same help content for the active forms.

NOTE: The Same Level option is the system default.

Profile option

In situations when different profiles are required for the same, or different departments customized profiles will need to be designed. For example, a PC profile that is created for the Assessors department may not necessarily be the same one used by the Public Works department. As the Profiles and Forms are different, the Help content may not be the same. Some confusion regarding functionality may arise unless specific instructions are provided. In this situation, the option for Profile should be selected. With the Profile option, content is placed in a separate directory that corresponds to each customized profile.

NOTE: Changing the parameter after the directory structure has been established is not destructive to the custom help content, but it will no longer be available until the settings are restored.
101-std-fea-002-GOV60-(UI HelpStruct-Schema)-[v6.0].png
Help Content Directory Structure – Click image to open in new window.

GSM – Security & Custom Folders

There is no security imposed on the Custom Help directories. This is the default setting for the installation. Administrators that wish to limit user access to these directories will have to do so using Windows security. Security settings will also need to be done on a user by user basis.

Custom HELP Directories

Security

There is no security imposed on the Custom Help directories. This is the default setting for the installation. Administrators that wish to limit user access to these directories will have to do so using Windows security. Security settings will also need to be done on a user by user basis.

Security Best Practices

BEST PRACTICES – SECURITY
The recommended security setting for administrators that require user restriction to directories, is as follows:

  • All top level Help directories should be set to READ ONLY. for the Custom folder.
  • In order for users to be able to add or update custom content, sub-directories of the top level Custom folder should be made accessible, i.e. READ / WRITE for users. This will allow them to place help in the directories when required.*


NOTE: The structure of default Standard, and Custom folders should not be modified.

Users are not required to create directories for the Custom Help folder; the structure established during installation must be kept in order for the content to be available.

NOTE: Unless additional files are required, the help content are in PDF format. Any additional formats that are mentioned above are files that are supplemental to the PDF with the main help content.


NOTE: When including any supplemental content, users must ensure that the file format is supported by the end-users system; e.g. if a MicroSoft Office PowerPoint document is to be one of the supplemental files, a PowerPoint viewer or a fully licensed version must be installed on the installation computer.

Note: Network traffic …

Custom HELP Content Nomenclature

CUSTOM HELP CONTENT NOMENCLATURE

  • Lower case names should be used.
  • Users should try to limit filenames of help content to no more than 12 characters because the group will expand to accommodate the name. See image below
  • Limit the length of directory names directories; try not to exceed 12 characters
  • Use the underscore character “_” in place of spaces. Ex. parcel_asmnt
  • Ensure that the extension of the file is supported by the end-user’s system that the content will be viewed on.
  • As a result of the brevity required for the filename, a detailed description of the Help Content can be entered using the Resource File editor in GNA. The node that contains this information is located in the WD module, CustomHelp function. The Keys for tool tips will be appended with an _TT in the names.

Refer to the Govern New Administration (GNA) Resource File editor. <LINK>

Help files Administration

Downloading

Deploy EZ option

Creating

The Govern application is designed to be flexible, with the understanding that users are able to design forms and reports. It is therefore expected that they may have a requirement to customize their Help files contents. When users customize Govern, supplementary help content can be created in one of two (2) ways.

  • Annotate existing system Help files
  • Generate new content with new PDF files

Annotating System Help Files

Users may annotate, i.e. add Notes, to existing system PDF files that correspond to the modules. Although system files should not be modified, there are steps that can be taken to ensure that system integrity is maintained.

Annotation Best Practices

BEST PRACTICES – ANNOTATING SYSTEM FILES
When annotating system PDF files, users should make a complete back up of the installed files. Only the copied files should be annotated and placed in the Custom folder. Original system files will remain in the Standard folder.

Generating PDF Help Files

When generating a PDF file with custom content, in order for the system to recognize the custom PDF file, it must have the same name as the one that is used in the Govern application or module.

For example, the Hazards (PC24) OpenForm in the Property Control module has been customized. A new PDF file is made containing custom instructions. In order for it to be accessible, the new PDF file should have the same name as the system default Help file. For Hazards the file is PC24.pdf; when this file is created, it should then be placed in the appropriate subdirectory in the Custom folder.

NOTE: When a custom PDF is placed in the Custom folder, it is not necessary to remove the system default help file in the Standard folder. System files should never be modified.

Adding or Replacing Help Content
There are two zones to the Help content ribbon in Govern. Zone 1 which contains the icon for the help content file is the area to click when you need to access the content. Zone 2, when selected, will give access to the directory that the content is located in.

NOTE: In instances where there is no help content and the broken help link icon is displayed, a click on the link will also display the directory.

The directories at the custom content is to be placed in is easily accessible with a click on the icon under the Help tab in the Govern ribbon.

Upgrades

The subject of upgrades is undergoing validation. News will be forthcoming.

Documentation

How to configure System Help

Click to view the Configure System Help document.


What’s New

Read More...

Web Help

[v6.0 1509.x] A Web based Help system is in place for the following Govern applications:
DeployEZ, Govern, Govern New Administration (GNA), OpenForms Designer (OFD), Business Entity Designer (BED), Govern Scheduler (GS), Govern Security Manager (GSM), and the Query Tool (QT).

On-line Help

[v6.x] On-Line Web Help
Product on-line Help&Doc Web

[v6.x Beta] Product Knowledge Base access
Access to Product Knowledge Base

Changes to the Help Directory

[Release 6.0.1407] Help is available for the batch processes
To setup:

  1. Standard or Custom Folders
  2. Then a folder “Batch Processes”
  3. Then a folder whose name is the bp name code
[Release v5.1] From Govern Release 5.1 and greater, changes were made to the structure of the Help file directories. The new structure was created to be able to present users with help content in different file formats. Content can include video clips, user system supported file types, custom images, and so on. As with prior versions of the help, the Adobe Acrobat PDF file format is used to distribute the content.
Help content is stored in multiple level directories. All standard content will be deployed as a ZIP archive file. Upon installation, the.ZIP package is then extracted to the Standard directory.

Subject Author Replies Views Last Message
No Comments


101-std-fea-002


0 votes, average: 0.00 out of 50 votes, average: 0.00 out of 50 votes, average: 0.00 out of 50 votes, average: 0.00 out of 50 votes, average: 0.00 out of 5 (0 votes, average: 0.00 out of 5)
You need to be a registered member to rate this.
Loading...