Accounts Receivable (AR) – Lockbox Form
Overview
The Govern OpenForms Lockbox is used to facilitate the data entry of multiple payments:
- Payments can be processed from a Lockbox file received from a Lockbox service or bank.
- Entered manually.
- Scanned and processed from an image file.
Documentation
To view this information as a pdf, click on the following link:
ARLockbox.pdf
For information on processing A/R Lockbox files, see A/R Lockbox Batch Processes
For information about configuring the A/R Lockbox, see Setting Up the A/R Lockbox
The A/R Lockbox is useful because payments received through a government office are cyclical. It
- Speeds up data entry time.
- Speeds up time to deposit payments in the organization’s account.
- Reduces data entry stress during heavy payment periods.
The Govern OpenForms A/R Lockbox solution includes:
- The A/R Lockbox User Form
Integrates Deposit Management A/R Lockbox Header and A/R Lockbox Details information
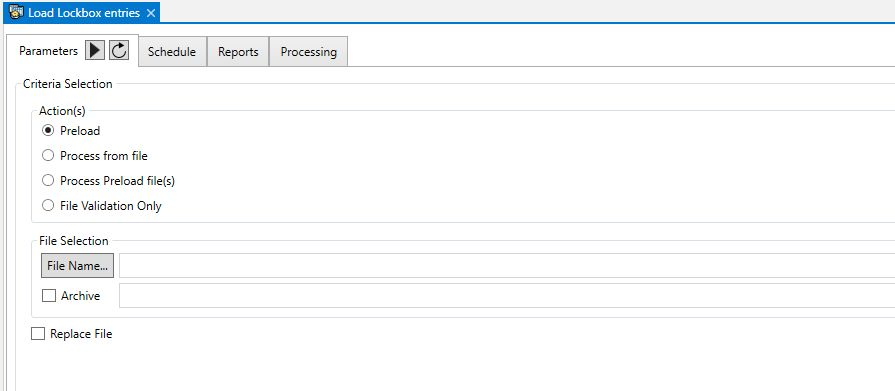
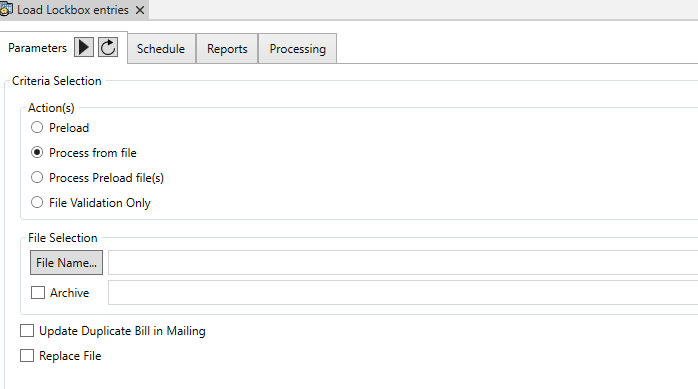
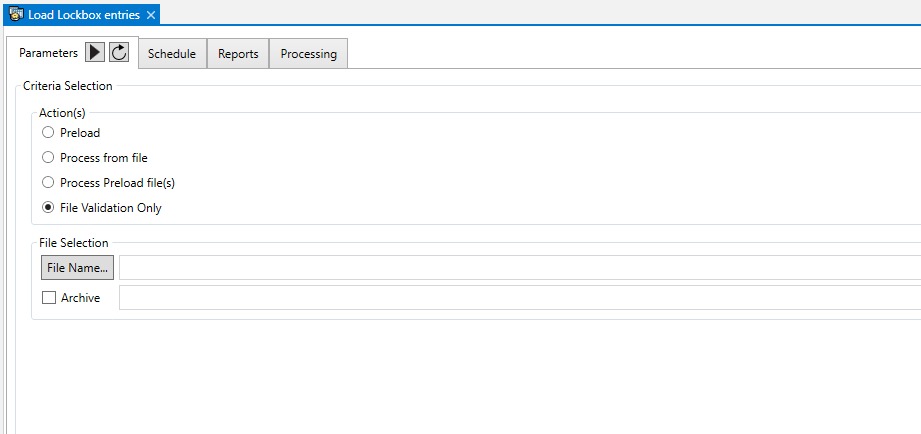
- The A/R Lockbox Batch Process
Provides options for Validating a File, Loading a File, Processing Payments Directly from a File, Processing Payments from a Preloaded File.
Read More...Read Less...
Accessing the A/R Lockbox
To access the A/R Lockbox:
- Launch Govern.
- Open a Profile that contains the A/R Lockbox form.
- Open the A/R Lockbox form.
Adding Lockbox Data Records
The Govern A/R Lockbox can be used for the following:
- Creating new lockbox records.
- Loading existing lockbox records.
Creating a New Lockbox Record
To create a new lockbox record:
- Launch Govern.
- Open a Profile that contains the A/R Lockbox form.
- Open the A/R Lockbox form.
- Select the Deposit Management tab.
- Do one of the following:
- Click New to create a new deposit number.
- Select an existing deposit number on the left.
Creating a New Deposit Number for Lockbox Entries
Deposit Management is mandatory for all A/R systems in Govern OpenForms.This includes the Lockbox. The transactions and entries for this application are managed and accessed through Deposit Numbers. These deposit numbers can be created automatically or manually.
If they are created manually, the user can enter a number in the Depsoit Number field or override the number that is automatically generated.
To create a new Deposit Number:
- Open the Lockbox form in Govern and select the Deposit Management tab.
- Do one of the following:
- If your setup includes manual creation of Deposit Numbers, you can override the number that is automatically created and displayed in the Deposit Number field.
Enter a new deposit number in this field.
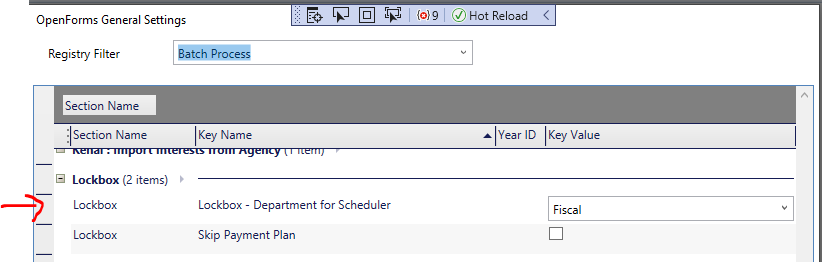
- If your setup includes automatic creation of Deposit Numbers, a deposit number is automatically created based on the configuration in Accounts Receivable General Parameters form in GNA.
Enter text to identify the deposit in the Description text box.
The user name and creation date are automatically entered.
- The transaction type is always Payments.
- Click Save.
The Summary information is entered through the batch process. This is describe in the following section.
Entering New Lockbox Detail Information
The Lockbox Detail information is associated with a barcode. The first step is to provide the barcode for this form. This can be entered manually or through a search.
To create a new Lockbox Detail record:
- Click New.
- Select By Barcode (A/R) in the Search window.
- Enter a barcode in the Barcode (A/R) field.
- Click the ellipsis button beside the Payer Name field and select click one of the following:
Search to search the database for an existing name or payer account.
New Name to create a new Name Account for the current record. This is created when you click Save.
New Payer Name to create a new payer account. This must be created after you click Save.
- Enter the amount of the transaction in the Amount field.
- Enter a date in the Effective Date field. This is the date that the transaction becomes effective.Tip: To enter the current date, position your cursor in the field and click [Ctrl+T] on your keyboard.
- Overwrite the date in the Entry Date field if required. By default, this field displays the current date.
- Make a selection from the Payment Type drop-down list. Payment Types are saved in the VTSYSTEM Table: CCTYPE.
- Select the Installment; such as, first, second, third, fourth installment or total (Table: VTSYSTEM_INSTALL).
The following are selected as applicable under Transaction Status when the batch process is complete.
- Load: The transaction is loaded to the database and saved to the tables AR_Lockbox_Detail and AR_Lockbox_Header.
- Modified: The transaction was modified on the Lockbox user form after it was loaded to the Govern Accounts Receivable A/R tables.Note: Once the batch process is run on the file or on the database tables, the transactions cannot be modified or deleted.
- Processed: The batch process was run on the transaction and it was saved to Govern Accounts Receivable A/R.
- Process Preload file(s): Apply payment from Lockbox tables loaded previously in Lockbox table with the selected Batch number not processed from the combo
Cash Collection Payment Types (VTSYSTEM_CCTYPE)
The Cash Collection Payment Type options include the following:
American Express, Cash, Credit or Debit Card, Certified check Change, Check, Discover Card, Electronic Fund Transfer,
Master Card, Money Order, Other 1, 2, 3, 4, 5; Payment in Lieu of taxes, Visa, Web ACH, Web Credit Card, Web Debit Card, Web eCheck, Web HPG, Web iCart
101-ar-frm-036
 (0 votes, average: 0.00 out of 5)
You need to be a registered member to rate this. Loading...