Accounts Receivable (AR) General Parameters
Overview
The General Parameters form is used for defining the A/R settings that are used throughout Govern. These include deposit management, subsystem priorities for A/R data, ACH parameters, and billing options.
To access the A/R General Parameters form:
- Launch GNA.
- Select Application Configurations > Accounts Receivable > A/R General Parameters.
Documentation
To see this information in pdf format, click on the following link:
Read More... Saving the General Parameters Minimum Balance to Compute Charges, or % You can select one or more options. Each is independent. ACH (PAP) Supported via Payment Plan Override G/L Entry Date by Posting Date The ACH City and Bank Parameters are required for setting up ACH Processing. This is available for Utility Billing and all Tax Assessment and Billing subsystems. See ACH Payment Processing for details. This section provides the A/R options for the subsystems. Is the subsystem linked by name or property? Is it set up by fiscal year? What is the minimum collection amount or percentage? For some subsystems, there is no option. For example, Bankruptcy is always linked by name. In these cases, the setting is disabled. This section describes the parameters that are listed for most subsystems: For example: If you enter 50%, the minimum payment amount is 50% of the installment due. The user cannot enter less than the calculated amount on the Payment Data Entry form in Govern. These parameters can be used instead of the Allow Payments < Late Charges Due option. If the previous installment is not completely paid, the remaining amount is added to the current installment. This must be paid before any amount on the current installment can be collected. For example, a $3,000. tax bill is divided into three installments of $1,000. each; the minimum collection amount is 50% ($500., in this example). The client pays $800.00 on the first installment, leaving $200.00 remaining. This is added to the second installment. The minimum amount that can be paid on the second installment is: Aircraft Excise TaxSee Excise Tax Subsystems. Link A/R to Names A/R Master by Fiscal Year Allow Payments < Late Charges Due See Excise Tax Subsystems. Select Business License under Related Subsystem Parameters to view or update the parameters for this subsystem. Link A/R to Names A/R Master by Fiscal Year Allow Payments < Late Charges Due Select Deed under Related Subsystem Parameters to view or update the parameters for this subsystem. Link A/R to Names A/R Master by Fiscal Year Allow Payments < Late Charges Due Link A/R to Names A/R Master by Fiscal Year Allow Payments < Late Charges Due Select Land Management under Related Subsystem Parameters to view or update the parameters for this subsystem. Link A/R to Names A/R Master by Fiscal Year Allow Payments < Late Charges Due Switch to Voluntary Payment when Payment without A/R Select Miscellaneous Billing under Related Subsystem Parameters to view or update the A/R parameters for this subsystem. Link A/R to Names A/R Master by Fiscal Year Select a default AR Class for miscellaneous billing payments made over the Web. A miscellaneous billing is created for subscriptions to the eProfile that are paid over the Web. Refer to the eProfile guide for complete details. See Excise Tax Subsystems. Link A/R to Names A/R Master by Fiscal Year A/R Master by Cycle Code When this option is selected, the Cycle field is enabled, for Personal Property on the following GNA forms: Accounts Receivable Security. See A/R Security Penalty / Int. Breakdown (Batch) Allow Payments < Late Charges Due Minimum Collection % or $ Link A/R to Names A/R Master by Fiscal Year A/R Master by Cycle Code Allow Payments < Late Charges Due Over, Short, and Duplicate Method Max Amount Over / Short $ Penalty / Int. Breakdown (Batch) When a transaction is made, it is automatically divided between the class codes. The penalties and interest are calculated according to the A/R Method selected. You do not need to create separate A/R Class Codes for this transaction type. When this option is deselected, the Link to Interest A/R Class and Link to Penalty A/R Class fields are enabled on the A/R Class Parameters form, under the following conditions: Minimum Collection % or $ Collection Year Link A/R to Names Link A/R to Names A/R Master by Fiscal Year Allow Payments < Late Charges Due Transfer Principal Amount Get A/R Class Interest by Project Default A/R Class Principal Default A/R Class Interest Link A/R to Names A/R Master by Fiscal Year For these subsystems, the Link A/R to Names and A/R Master by Fiscal Year options are disabled and selected. A/R records for these subsystems are always defined by name and saved by fiscal year. There are three subsystems for tax title data: Link A/R to Names 103-ar-parm-General Action Buttons
Click Save (Ctrl + S) to save the Accounts / Receivable General Parameters settings to the SY_REGISTRY.
Cancel
If there are unsaved modifications, the Exit button changes to Cancel. When you click Cancel, the unsaved data are removed from the form.
Exit
Click Exit to close the form. A confirmation message is displayed if there are any unsaved modifications. Click Yes to save or No to close without saving.Accounts Receivable General Parameters for All Subsystems
Enter the minimum balance, as an amount or percentage, on which late charges, including interest and penalties, can be applied.
Department Used from the Web
If you are using the Govern eGovernment application, this parameter is required. Select a default department for managing the A/R data from the web.
Bill Number Prefix
Select this option to use a two-digit prefix for A /R billing. If this option is selected, the Bill Prefix field is displayed on the Govern Tax Posting to A/R batch process.
Use Exact Installment
Select this option to prevent collection of the second installment of a bill before the first is collected. Otherwise, if the second installment is collected while the first remains outstanding, it is saved as the total payment in the database.
Security by Area
This option is not applicable to Govern v6.
The Security by Area parameter is valid for Govern for Windows only. For complete details on setting up security in Govern OpenForms, see Security for Govern OpenForms.
Bypass Funds Reapplication
The Bypass Funds Application is available for the following subsystems:
Select the option to save overpayments as Open Credit Transactions (OCT), on the applicable subsystem. Deselect the option to apply overpayments to another LM permit, MB invoice, SA project, or ST period, as applicable.
Use Proportional Distribution
Select this option to enable Proportional Distribution for cash collection. With Proportional Distribution, payments are distributed according to the amount owed on each account.
For example, in the following scenario, a taxpayer owes $150.00 for electricity and $50.00 for water, but pays a total of $100.00; i.e., 50% of the amount due. With proportional distribution 50% of each bill is paid; i.e., $75.00 is paid on the electric bill and $25.00 on the water bill.
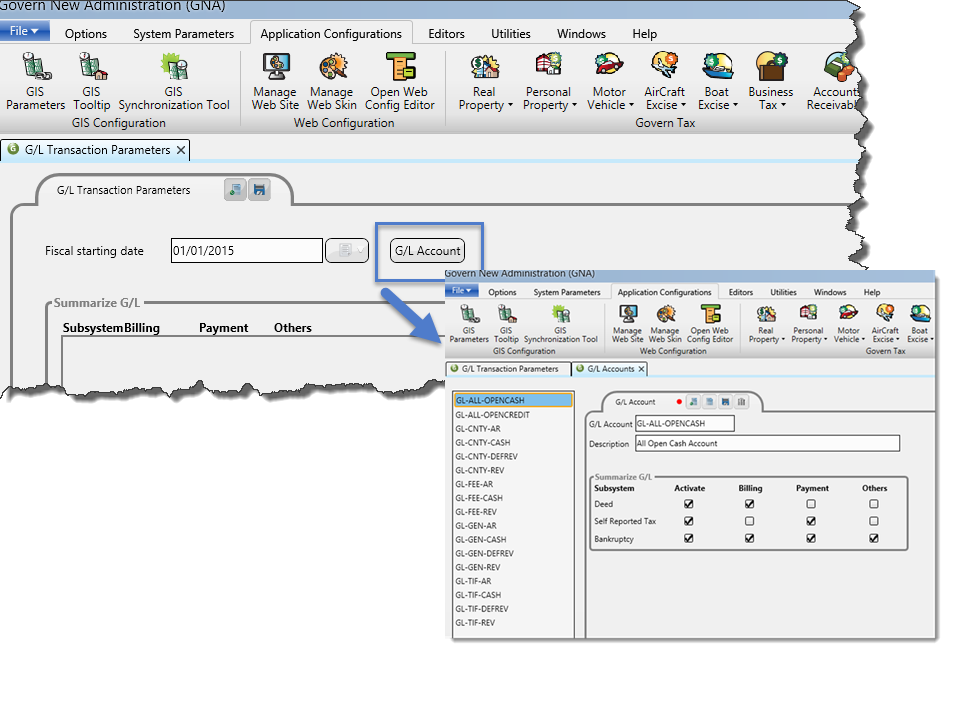
Activate G/L Validation
Select Activate G/L Validation if you are using the Govern General Ledger (G/L) interface. G/L Validation ensures that the
G/L account types entered for the A/R Class Code are valid for the selected transaction type. When this option is selected, the valid G/L account type fields are enabled on the G/L Distribution Parameters form. See GL Distribution Parameters.
If you are not connected to a G/L interface database, the Account Type drop-down lists on the G/L Distribution Parameters form are populated from the AR_PARM_GL_ACCNT table.
NOTE: If this setting is enabled, you must set up a G/L distribution for all A/R Class Codes.
The following error message is displayed if you try to save an A/R Class Code without setting up G/L distribution.
A/R Class Codes without G/L distribution.
This error message is generated if you try to save A/R Class Codes from a previous year when this setting was deselected. The A/R Class Codes are saved by year. The General Parameters are not.
Select this option if you want to accept ACH Pre-authorized Payment (PAP) for payments made through a payment plan. When this option is selected, the Payment Option is added to the Payment Plan Information section of the Payment Plan user form. When you set up a payment plan, you can select Manual, Payments by ACH (PAP), or postdated check.
If this option is not selected, the Payment Option is not added to the Payment Plan. For details, see Payment Plan.
Select this option to override the entry date saved with the G/L transaction with the posting date.
Typically, the entry date is maintained in the General Ledger. However, for some clients, the posting date is more useful for files that are exported to another system or organization.
No SRT Discount if Not Full Payment
If you are using the self-reported tax module, select this option to apply the discount only when the full payment is received. Refer to the SRT documentation for further details.ACH City and Bank Parameters
Related Subsystem Parameters
General Information for Related Subsystem Parameters
Link A/R to Names
Select this option to associate the A/R for the selected subsystem with he NA_ID. Other the A/R is associated with the P_ID.
If the A/R is linked by property, the user can perform a search by property or account number when accepting payments or performing an account inquiry. If the A/R is linked by name, the user can also search by name.
For some subsystems, this option is disabled. For example, it is disabled and always selected for Bankruptcy, Delinquency Collection, Personal Property, and the excise tax subsystems because the A/R for these subsystems is always linked by name. It is disabled and selected for Special Assessment because the A/R for this subsystem is always linked by property.
A/R Master by Fiscal Year
Select this option to save the A/R records for the selected subsystem by fiscal year.
For some subsystems, this option is disabled. It is always selected for the Tax and Assessment subsystems because they are saved by fiscal year. It is always deselected for Utility Billing because this subsystem is not saved by fiscal year.
Allow Payments < Late Charges Due
Select this option to accept payments that are less than the interest and penalties on the Payment Data Entry form in Govern.
Minimum Collection % or $
Enter the percentage or amount acceptable for minimum collection, if applicable.
$200.00 (unpaid amount from first installment)
+500.00 (minimum collection amount for second installment).
$700.00Bankruptcy
This option is disabled and selected. The A/R for Bankruptcy is always linked by name.
Select this option if you want to save the A/R records for Bankruptcy by fiscal year.
Select this option to allow the collection of payments that are less than the interest and penalties on the Payment Data Entry form in Govern.Boat Excise Tax
Business License Subsystem
Business License records are always created by name. This option is selected and disabled for this subsystem.
This option is disabled and deselected.
Select this option to allow the collection of payments that are less than the late charges due.Deed Information Subsystem
By default, Accounts Receivable records are created by property for the Deed Information subsystem. Select this option to create records by name.
Select this option to save Deed Information AR records by fiscal year.
Select this option to allow the collection of payments that are less than the interest and penalties on the Payment Data Entry form in Govern. Refer to the Mass Appraisal Sales and Comparable Sales documentation for more information.Delinquency Collection
This option is disabled and selected. The A/R for Delinquency Collection is always linked by name.
Select this option if you want to save the A/R records for Bankruptcy by fiscal year.
Select this option to allow the collection of payments that are less than the interest and penalties on the Payment Data Entry form in Govern.Land Management Subsystem
By default, Accounts Receivable records are created by property for the Land Management subsystem. Select this option to create records by name. Records are defined, according to the type of name, selected on the Default Link Name parameter defined on the Land Management Parameters form; for example, the applicant for a permit record. Refer to the Permit & Inspections guide for details.
For the Permit to Name and License to Name functions, the Accounts Receivable records are automatically created by name.
Select this option to save Land Management A/R records by fiscal year.
Select this option to allow the collection of payments that are less than the interest and penalties on the Payment Data Entry form in Govern.
This option is applicable to the Payment Data Entry form in Govern. When a payment is on an account that has no active A/R, Voluntary Payment has to be selected as the transaction type.
When this option is deselected, an error message is displayed if another transaction type is selected.
When this option is selected, the transaction type for any payment on an account without Active A/R is automatically changed to the Voluntary Payment transaction type.Miscellaneous Billing Subsystem
This option is disabled and always selected for the Miscellaneous Billing subsystem. Although you can link a property to a Miscellaneous Billing record, accounts are initially set up by name.
Select this option to save the miscellaneous billing records by fiscal year.Web Default Class
Refer to the Miscellaneous Billing documentation for more information.Motor Vehicle Excise Tax
Personal Property Taxation Subsystem
Select this option to link the A/R to the Business or Occupant Name entered on the Personal Property Assessment Maintenance function.
This option is always selected for the Personal Property Tax module. A/R records for this module are saved by fiscal year.
You are able to set up the Personal Property Tax subsystem by Cycles, similar to the Real Property Taxation. Select this option to use A/R Cycle Codes with the Personal Property Tax subsystem; such as, county, district and school (Table: VT_USR_ARCYCLE). Personal Property cycles are defined in the same table as Real Property Tax cycles.
A/R Class Parameters. See A/R Class.
See Penalty / Int. Breakdown (Batch).
Select this to accept payments that are less than the interest and penalties due on the Payment Data Entry form in Govern. This option can be used instead of the Minimum Collection % or Amount parameters.
Enter the percentage or amount acceptable for minimum collection. These parameters can be used instead of the Allow Payments < Late Charges due option. Refer to the Personal Property Tax Assessment & Billing documentation for more information.Real Property Sub-System
Select this option to link the A/R to the Primary Name in the Real Property Mailing Index.
This option is always selected for the Real Property Tax module. A/R records for this module are saved by fiscal year.
Cycle Codes are required for all Tax and Assessment subsystem in Govern OpenForms. Select this option to use A/R Cycle Codes with the Real Property Tax subsystem; such as, county, district and school (Table: VT_USR_ARCYCLE).
Select this to accept payments that are less than the interest and penalties due on the Payment Data Entry form in Govern. This option can be used instead of the Minimum Collection % or Amount parameters.
If this option is selected, duplicate and over-payments are automatically handled as follows:
The real property tax is paid, leaving a zero balance.
A negative or positive credit is generated for the difference.
Enter the maximums for applying this method to over and short payments. Typically, the method is used for small amounts and the maximums are for a few cents.
This option is available for Real Property Tax, Personal Property Tax, and Utility Billing.
Select Penalty / Interest Breakdown (Batch) to use the Penalty / Interest Breakdown (Batch) process.
When this option is selected, the same A/R Class Code is used for the transaction, the penalty, and the interest. These are entered with interest (int) and/or penalty (pen) transaction types. For details, see A/R Class Code Process Map.
For example, the customer owes $50.00 for water billing and $50.00 for sewer billing. The penalty is 1% per month; normally, $1.00 is charged through the Penalty Type class code. However, using the Penalty / Interest Breakdown option, $0.50 is charged through a water class code and $.50 through a sewer class code.
Deselect the Penalty and Interest Breakdown Batch option to send penalty and interest amounts to separate A/R Class Codes.
A/R Class Codes for Penalty or Interest Transaction Types exist for the sub-system.
An A/R Method is selected for the A/R Class Code.
You can link an A/R Class Code for penalty and a code for interest to the selected A/R Class Code. When a payment is received the penalty and interest amounts are automatically sent to the linked A/R Class Codes.
If an interest or penalty A/R Class Code is not specified, the first class code found for penalty or interest is used. See A/R Class Code Process Map
Enter the percentage or amount that is acceptable for minimum collection. See Related Subsystem Parameters for conditions.
Enter the last year for which you are collecting bills. For example, if you enter 2014, users cannot accept payments on bills dated 2013 and before. Typically, this option is used by municipalities that transfer bills to the county, or to another level of government, after a set time has passed.Self Reported Tax Subsystem
All Self-Reported Tax records are created by name. This option is selected and disabled for this subsystem.
A/R Master by Fiscal Year
Select this option to save the AR records for the Self-Reported Tax subsystem, by fiscal year.
Refer to the Self Reported Tax guide for more information.Special Assessment
This option is disabled and deselected. The A/R for Special Assessment projects is always linked by property.
This option is disabled and deselected. Special Assessment projects are created for longer periods of time.
Select this to accept payments that are less than the interest and penalties due on the Payment Data Entry form in Govern.
Select this option in order to enable users to transfer the principal for Special Assessment projects.
Select this option if users need to separate interest according to betterment projects.
An A/R Class Code for the principal generated from betterment projects is required. Select an A/R Class Code from the drop-down list.
An A/R Class Code for the interest generated from betterment projects is required. Select an A/R Class Code for the drop-down list. You can select the same A/R Class for both principal and interest.Utility Billing Subsystem
Select this option to link the A/R for the Utility Billing subsystem to the Primary Name in the Utility Billing Mailing Index. Otherwise, the A/R is linked by property for this subsystem.
If you are using the Move In Move Out function, select this option to ensure that the moving in services are billed to the correct occupant.
This option is disabled and deselected. Utility Billing records are not saved by year.
Penalty / Int. Breakdown (Batch)
See Penalty / Int. Breakdown (Batch).
No Penalty on Penalty
Select this option to prevent charging a penalty on top of an existing penalty. This option is enabled only if the Penalty / Interest Breakdown option is selected. Refer to the Utility Billing guide for more information.
Excise Tax Subsystems
Select Aircraft or Boat Excise Tax under Related Subsystem Parameters to view or update the parameters for this subsystem.
Allow Payments < Late Charges Due
Select this to accept payments that are less than the interest and penalties due on the Payment Data Entry form in Govern. This option can be used instead of the Minimum Collection % or Amount parameters.
Minimum Collection % or $
Enter the percentage or amount acceptable for minimum collection.Tax Title Parameters
The Link A/R to Names option for each tax title subsystem matches the Link A/R to Names setting for the corresponding subsystem. For example, if Link A/R to Names is selected for the Real Property subsystem, it is automatically selected for the Tax Title (Real Property) subsystem. If it is deselected for the Real Property subsystem it is automatically deselected for the Tax Title (Real Property) subsystem.
If these options are selected, the A/R is linked to the following:
Real Property Tax Title: links the A/R to the Primary Index in the Real Property Mailing Index
Personal Property Tax Title: links the A/R to the Business or Occupant Name entered on the Personal Property Assessment Maintenance function.
Land Management Tax Title: links the A/R to the default Link Name Type entered on the Land Management Parameters form.
A/R Master by Fiscal Year
This option is always selected for the Tax Title subsystems. A/R records are saved by fiscal year for tax title.
Minimum Collection % or $
Enter the percentage or amount acceptable for minimum collection for the tax title subsystems, if applicable. See Related Subsystem Parameters for conditions.
Refer to the Tax Title documentation for more information on these subsystems.
NOTE: A/R General Parameters are saved to (Table: SY_REGISTRY).
See Also
 (0 votes, average: 0.00 out of 5)
You need to be a registered member to rate this. Loading...