AR – CC – Allow Payment less than Payment Plan Amount

Accounts Receivable (AR) & Cash Collection (CC) – Allow Payment less than Payment Plan Amount

Overview

This feature allows the collection of a payment that is less than the predefined Payment Plan Amount.

User Interaction

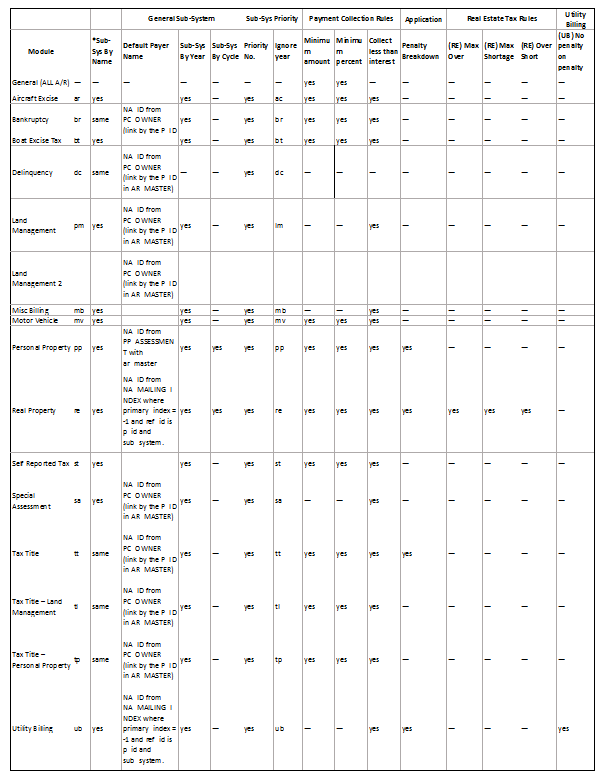
In Cash Collection, when a user tries to make a payment that is less than the set minimum to collect, a pop-up message is displayed. This message will block the transaction and prevent the saving of the payment. If the permission is checked, the message will no longer be displayed to the user. The payment can then be saved even if the amount is less than the set minimum that is to be collected.

Setup

To configure this option, you must set the new security parameter in the OpenForms Designer (OFD). This option can be set by Profile or by user for the Cash Collection Form.

NOTE: The default setting for all users for this permission is, False (F) .

In the OFD select… Cash Collection > Payment Data Entry > CCPaymentDataEntry_Control (while in security mode), set the following parameter:

  • Allow to pay less than minimum to collect


101-ar-fea-038


0 votes, average: 0.00 out of 50 votes, average: 0.00 out of 50 votes, average: 0.00 out of 50 votes, average: 0.00 out of 50 votes, average: 0.00 out of 5 (0 votes, average: 0.00 out of 5)
You need to be a registered member to rate this.
Loading...


AR – CC – Receipting Feature

Accounts Receivable (AR) & Cash Collection (CC) Receipting Feature

Version 6.0 | Version 6.1 (In Development)

Overview

See A/R General Parameters


101-ar-fea-003


0 votes, average: 0.00 out of 50 votes, average: 0.00 out of 50 votes, average: 0.00 out of 50 votes, average: 0.00 out of 50 votes, average: 0.00 out of 5 (0 votes, average: 0.00 out of 5)
You need to be a registered member to rate this.
Loading...

AR – CC – Allow Interest and Fees As of Date Feature

Accounts Receivable (AR) & Cash Collection (CC)
Allow Interest and Fees As of Date Feature

Version 6.0 | Version 6.1 (In Development)

Overview

This information will be updated when it becomes available.


101-ar-fea-007


0 votes, average: 0.00 out of 50 votes, average: 0.00 out of 50 votes, average: 0.00 out of 50 votes, average: 0.00 out of 50 votes, average: 0.00 out of 5 (0 votes, average: 0.00 out of 5)
You need to be a registered member to rate this.
Loading...

AR Feature – Payer Name Custom Control

Using the Payer Name Custom Control

Version 6.0 | Version 6.1 (In Development)

Overview

The Payer Name custom control can be added to any Govern user form. By default, it is added to the Cash Collection and the A/R Lockbox forms. You can add a payer name on the fly or you can configure a direct link to the Name and Address form. This greatly facilitates the task of adding payer name information to a form. This control:

  • Displays the last five payers to facilitate data entry
  • Adds a search for an existing name.
  • Permits the entry of a name without creating an entry in the database (Table: NA_NAMES)
  • Provides a direct link to the Name and Address form so that you can create a new name.

Note: NA_NAMES can be opened in Modal Mode or as a standard user form in the Profile.

This page describes the following topics::
Configuring the Payer Name Control

  • Configuring the Payer Name in the Business Entity Designer (BED)
  • Configuring the Payer Name in the OpenForms Designer (OFD)

Using the Payer Name Control in Govern

  • Searching for an Existing Name and Address Record and Adding It as the Payer Name
  • Completing the Name and Address Information After Saving an A/R Record
  • Completing the Name and Address Information Before Saving the Record
  • Opening the Name and Address Form in Modal Mode
  • Adding a New Payer Name On The Fly

Documentation

To view this information in pdf format with screen shots and examples, click on the following link.

PayerName.pdf

Configuring the Payer Name Control

The configuration for the Payer Name Control is described in two sections:

  • Configuring the Payer Name Control
  • Using the Payer Name Control in Govern

Configuring the Payer Name in the Business Entity Designer (BED)

This section is for informational purposes. There are no required steps.

The following attributes are included in the Payer Name custom control:

  • NA_ID
  • PAYER_NAME
  • ARIDLIST

ARIDLIST is a calculated field that provides the list of A/R IDs for the last payers.

Configuring the Payer Name in the OpenForms Designer (OFD)

The following configuration is required for the Payer Name. You can set the properties for the following

  • Viewing / Adding the Payer Name Custom Control
  • Defining the Actions

Viewing / Adding the Payer Name Custom Control

To view the payer name custom control properties:

  1. Launch the OpenForms Designer (OFD).
  2. Open a form that includes the Payer Name custom control, such as ARLockbox (AR036).
    Alternatively, open the form to which you want to add this control.
  3. Select the entity, such as Lockbox Detail, that contains CC_PayerName_Control.
    Alternatively, open the entity to which you want to add this control.
  4. Expand the first Misc. in the Properties explorer.
  5. Click the ellipsis button in the Action parameter.
  6. Ensure that MsGovernOpenFormsCustomControl.dll is selected in the left column.
  7. Select CC_PayerName_Control is selected in the right column.
  8. Click OK on the Extension Selector.

Defining the Actions in the OFD Property Explorer

The properties in this section are used to define the actions that are triggered by the Payer Name custom control. These properties are used to add options to the Payer Name menu in Govern. There are a maximum of three options:
The menu appears when you click the ellipsis button in the Payer Name parameter on the Govern user form.
To define these properties:

  1. Expand Properties > Misc in the Property Explorer.
  2. Define the properties as described under the following headings:
  3. Click Save on the OpenForms Designer after completing the actions to save the modifications.

Creating Names

  • CanCreateNames: Select this option to add the New Name option to the Payer Names menu on the Govern form. This option is required for the FastNameCreation and SelectedFormNameinProfile options.
  • Deselect this option to remove the New Name option from the menu. Note, the new payer name option is independent.

Creating Payer Names

  • Select the CanCreatePayerNames option to add the New Payer Name option to the Payer Name menu. When this option is selected, you can create a new payer name on the fly.
  • Deselect this property to remove the option from the menu.
NOTE: The user can enter a payer name on the form, only if the Payer Name option appears in the pop-up menu.
Otherwise, if this option is not displayed, the parameter is disabled.

Searching for Names

  • Select CanSearchExistingNames: to add the ability to search for a name in the Govern database. The Search appears in the Payer Name menu on the Govern form, when you click the ellipsis button.
  • Deselect this option to remove the search option and functionality.

Adding a Header

  • Enter text in the Control Header parameter.
    The text you enter appears on the form above the custom control in Govern. Payer Name is the default.

Creating a Name Before Saving the Record

  • Select FastNameCreation to open the Name and Address form when the user selects New Name in the Payer Name field on the Govern user form. A scenario follows. This is recommended for Cash Collection. If this option is selected, CanCreateNames must be selected, as well.
  • Deselect this option if you do not need to open the Name and Address form directly. This is recommended for the Lockbox.

Opening a Form in Modal Mode

  • OpenFormAsModal: Select this option to open the Name and Address from in Modal Mode.
  • The modal form opens in a secondary window.
  • The focus is on the modal form. No actions can be performed on other forms until the modal form is closed.
  • Deselect the OpenFormAsModal option if you want to open the Name and Address form as a standard user form in Govern.

Adding a User Form

SelectedFormNameInProfile: Select the user form from the that you want to open when the user clicks New Name. Typically, this is the Name and Address form.

Adding the Search Group and Style

  • SelectedSearchGroup: Select the Search group to launch from the Payer Name > Search option.Typically, this is the Name Search.
  • SelectedSearchStype: Select the Search style to launch from the Payer Name > Search option.
  • For example, if you selected the Name Search as the Search Group, you could select the Name ID, naNameID, as the search style.

Alternatively, leave this option blank to display all the name search styles in the list.

Using the Payer Name Control in Govern

For the examples in this section, the Payer Name Control is added to the A/R Lockbox. Possible actions include:
Selecting the

  • Searching for an Existing Name
  • Creating a Name and Address After Saving the Record
  • Creating a Payer Name On the Fly
  • Creating a New Name and Address Before Saving the Record
  • Opening the Name and Address form in Modal Mode

The required properties for each action are listed.


What’s New

6.0 Payer name will now be recorded in CC_MASTER_PAYOR_NAME instead of NOTES.
6.0 The Mailing index Owner of Record is no longer used as a default

Related Topics


101-ar-fea-021


0 votes, average: 0.00 out of 50 votes, average: 0.00 out of 50 votes, average: 0.00 out of 50 votes, average: 0.00 out of 50 votes, average: 0.00 out of 5 (0 votes, average: 0.00 out of 5)
You need to be a registered member to rate this.
Loading...

CC – Posting Batch Process

Cash Collection Posting Batch Process

[see Roadmap 6.0]

Overview

Information will be provided when available.


101-ar-bp-032


0 votes, average: 0.00 out of 50 votes, average: 0.00 out of 50 votes, average: 0.00 out of 50 votes, average: 0.00 out of 50 votes, average: 0.00 out of 5 (0 votes, average: 0.00 out of 5)
You need to be a registered member to rate this.
Loading...

CC – Cash Collection Configuration

Cash Collection Configuration

Overview

The configuration steps for Cash Collection are as follows:

  • Preliminary Setup
  • Cash Collection Parameters
  • A/R Parameters & AR Class Codes
  • A/R Subsystem Parameters and Priorities

Preliminary Setup

Department Setup

  • A/R Subsystems Allowed: The subsystems used for Cash Collection must be selected for the department.

Profile Editor

Multiple Profiles can be set up for Cash Collection. Different security permissions can be defined for each Profile. Different user forms and batch processes can be linked to each Profile.

  • Dynamic Queries and Default Access
  • The following forms need to be added to the profile (Links Tab):
    • CC001 (Cash Collection)
    • NA001 (Name and Address) Linked Form Controller You can search for and select names without adding this form to your Profile. However, if you want to link to the Name & Address form in order to create a new name, the form must be linked to the Profile.
    • AR008 (A/R Inquiry) Required for opening A/R Inquiry form directly from the selected A/R record in the payment data entry grid (double-click).
    • Any other Form used as a link General Link Controller (custom setup)
  • The following reports need to be added:
    • 101-cc-rpt-058
  • The following batch programs need to be added to the profile (depending on security setup)
    • 101-ar-bp-020 – Cash Collection Payment Posting

Validation Tables

User and System Validation Tables

The following tables are used in Cash Collection:

  • Default Payment Collection Type (Cash, Checks, Money Order…) CCTYPE — is now a SYSTEM Table
  • USER Table CCTYPE Previously used in Govern Form Windows for CC Access Type (upgrade requirement)
  • AR Transaction Types Deposit ART2TYPE
  • CC Receipt table CCPMT
  • CC Default Deposit Format DEPOSIT
  • LETTER_C Letter code used to flag the payment record.
  • MCR_GRP Miscellanous Cash Receipt Group (AR Class linked to MCR Group)

Dynamic Search Queries

  • Dynamic Search Groups that will be used for the Quick Search Controller setup on the Cash Collect Payment Data Entry
    • The distributed form default search group is Payment Data Entry
  • Dynamic Search Style linked to the Group

Cash Collection Parameters

The Accounts Receivable Cash Collection Parameters are used for setting the defaults for the Govern OpenForms Cash Collection Payment Data Entry form and for the cash collection receipts.

The default Cash Collection Parameters can be defined at the following levels:

  • Computer Name: If you define settings by computer name, all users logged in to the computer have the same defaults.
  • User ID: If you define settings by user ID, the defaults are specific to the user.

If parameters are defined at multiple levels, the settings defined at the user level override those defined at the computer. Parameters defined on the workstation override those defined on the server, in a Terminal Server environment.

For details on the Cash Collection Parameters, see:
SettingUpCashCollectionParameters.pdf

General A/R Parameters

All A/R Parameters

Module A/R Parameters

Cash Collection Parameters

This information is currently not available.

Business Entities Configuration (BED)

See OpenForms Setup for more info (101-cc-ofr)

  • Used by Query Tool Property – Model (CC-001)
  • Note is Required on Creation – Entity (AR_DEPOSIT)
  • Note is Allowed on Modification
  • Note is Required on Creation – Entity (CC_MASTER)
  • Note is Allowed on Modification

OpenForms Designer (OFD)

Form Configuration (OFD)

See OpenForms Setup for more info (101-cc-ofr)

Search Group

Payment Data Entry Controller CCPaymentDataEntry_Control

  • Click on the Payment Data Entry Tab
    • Click on the CC PaymentDataEntry_Control
    • In the Properties, expand Properties, expand Misc
    • Select the Dynamic Group to use in the Quick Search form

Payer Name Controller

  • Can Create Properties
  • Selected Search Group and Name and Address Form

Enable Auto-Launch of A/R form (Drill Down to A/R Inquiry)

As of Release 6.0.1603.262 the Cash Collection Payment Data Entry grid can configured to exhibit a new behavior when the user double clicks on a line item.

To obtain this new behavior, configuration will need to occur in the Payment Data Entry tab of the Cash Collection OpenForm. This configuration is carried out using the OpenForms Designer (OFD). To make this change in the OFD…

  1. Open the CC001 – Cash Collection Form
  2. Click to select the Payment Data Entry tab
  3. Locate and click on the CCPaymentDataEntry_Control.
  4. On the right hand side, Properties pane, locate and expand the Misc section; set the ArInquiryForm parameter to AR008 – Accounts Receivable.
  5. Click Save.

Behavior in Govern

In Govern, when users are in the Cash Collection form, click on the Cash Collection Data Entry tab. A double click on a line item in the grid will load the Accounts Receivable (AR008) form

Form Security (OFD)

Deposit Management Controller

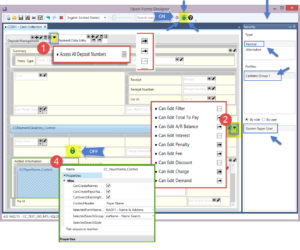
  • Security Access to all Deposit Numbers
    OFD Configuration

Payment Data Entry

  • Payment Data Entry Date Controller Security
  • Payment standard fielkds Notes, letter form, etc.

Payment Data Entry Controller CCPaymentDataEntry_Control

  • Security Access to change the following fields in the payment grid:


Key Resources Fields Notes
CC CC_PaymentDataEntry,TotalToPayColumnPermissions Can Edit Total To Pay
CC_PaymentDataEntry,ArBalanceColumnPermissions Can Edit A/R Balance
CC_PaymentDataEntry,InterestColumnPermissions Can Edit Interest
CC_PaymentDataEntry,PenaltyColumnPermissions Can Edit Penalty
CC_PaymentDataEntry,FeeColumnPermissions Can Edit Fee
CC_PaymentDataEntry,DiscountColumnPermissions Can Edit Discount
CC_PaymentDataEntry,ChargeColumnPermissions Can Edit Charge
CC_PaymentDataEntry,DemandColumnPermissions Can Edit Demand
CC_PaymentDataEntry,SelectedDitributionFilterColumnPermissions Can Edit Filter The purpose of this filter is to select ST periods to pay or
tax installments. See roadmap for more information


IMPORTANT: By default, all users have access changing the collection fields


Profile, Role & User Security (GSM)

Application – Govern Profiles

  • Execute Form CC001
  • Execute Form NA001
  • Execute Form AR008

Troubleshooting

After importing Forms.xml

  • Once the import is completed, it is a good practice to refresh the entities in the Business Entity Designer, then to review the forms in OFD.
  • GSM Synchronize (after setup of new imported items or profile links)

A/R Sub-systems are not all showing

  • Organization License Serial Number is invalid

A/R Payment Application Object Errors


101-cc-config


0 votes, average: 0.00 out of 50 votes, average: 0.00 out of 50 votes, average: 0.00 out of 50 votes, average: 0.00 out of 50 votes, average: 0.00 out of 5 (0 votes, average: 0.00 out of 5)
You need to be a registered member to rate this.
Loading...