AR – Inquiry Notes

Accounts Receivable (A/R) Inquiry Notes

Overview

Use the Notes tab of the A/R Inquiry form for adding comments and warning codes, additional information about delinquent charges, history, arrears, and ACH payment information to the selected record.

Documentation

For the complete reference guide, see 101-all-001-GovernAccountsReceivable-(man)-(6.0)
For the A/R Transaction Rules, see 101-ar-001-AR-TransRulesGL.

Prerequisites

The following Regular User Validation Tables are required for the A/R Alerts, Warnings, and Protest Codes.

  • ARALERT: for the A/R Alert Codes
  • ARWARNC: for the A/R Warning Codes
  • ARPROT: for the A/R Protext Codes
  • COLLAGCY: for the Collection Agencies used for A/R

To access these tables:

  1. Launch GNA.
  2. Select Editors > User Validation Table Editor.
  3. Select Regular from the Table Type drop-down list.
  4. Select the table.
  5. Click Codes to add, modify, or delete codes.
  6. Click Save.

Completing the Notes Form for Alerts and Warnings

The form contains the following sections:

  1. General Information
  2. ACH Information
  3. Notes and Comments

General Information

Alert Code: Select an Alert Code from the drop-down list (Table: VT_USR_ ARALERT). An Alert is more severe than a Warning. If an alert code is associated with the account, no payment entry can be made.
Warning Code: Select a Warning Code from the drop-down list (Table: VT_USR_ARWARNC). A Warning is less severe than an Alert, in that a notification is sent, but the user can make a payment entry.
Collection Agency: Select a Collection Agency for the account from the drop-down list (Table: VT_USR_COLLAGCY).
Notes and Comments: Enter any notes or comments for the account.

Additional Information

Not Subject to Delinquent Charges
Select this option if you don’t want any interest calculated on the current account. Otherwise, these charges are calculated automatically.
History / Inactive Account
Select this option to indicate the account is historical or inactive. No further Accounts Receivable transactions can be performed on the account.
Arrears
Select the calendar beside the Arrears date field to select the date that the account went into arrears. Depending on your organization, the date could be populated by a batch process.

ACH Information

Amount: This field displays the amount for the selected record. This can be the amount of the displayed installment or a fixed amount. To override this value, for example, for partial payments, modify the field directly and click Save.
Installment: If the displayed amount is an installment, this field displays first, second, third, fourth or total (Table: VT_SY_INSTALL).
Active Flag: The Prepare Data for ACH File process sets the Active Flag to Pending. In the Pending state, you can:

  • Modify the displayed amount.
  • Change the Active Flag to Manually Deactivated.

Records set to Manually Deactivated are not included in the ACH File. Use this state for accounts that cannot be prenoted; for example, invalid accounts.
ACH Date: This field displays the date the Prepare Data for ACH File process was run.
Fixed Amount: Select this option if the selected amount is a fixed amount.


101-ar-frm-003


0 votes, average: 0.00 out of 50 votes, average: 0.00 out of 50 votes, average: 0.00 out of 50 votes, average: 0.00 out of 50 votes, average: 0.00 out of 5 (0 votes, average: 0.00 out of 5)
You need to be a registered member to rate this.
Loading...


AR Feature – Payer Name Custom Control

Using the Payer Name Custom Control

Version 6.0 | Version 6.1 (In Development)

Overview

The Payer Name custom control can be added to any Govern user form. By default, it is added to the Cash Collection and the A/R Lockbox forms. You can add a payer name on the fly or you can configure a direct link to the Name and Address form. This greatly facilitates the task of adding payer name information to a form. This control:

  • Displays the last five payers to facilitate data entry
  • Adds a search for an existing name.
  • Permits the entry of a name without creating an entry in the database (Table: NA_NAMES)
  • Provides a direct link to the Name and Address form so that you can create a new name.

Note: NA_NAMES can be opened in Modal Mode or as a standard user form in the Profile.

This page describes the following topics::
Configuring the Payer Name Control

  • Configuring the Payer Name in the Business Entity Designer (BED)
  • Configuring the Payer Name in the OpenForms Designer (OFD)

Using the Payer Name Control in Govern

  • Searching for an Existing Name and Address Record and Adding It as the Payer Name
  • Completing the Name and Address Information After Saving an A/R Record
  • Completing the Name and Address Information Before Saving the Record
  • Opening the Name and Address Form in Modal Mode
  • Adding a New Payer Name On The Fly

Documentation

To view this information in pdf format with screen shots and examples, click on the following link.

PayerName.pdf

Configuring the Payer Name Control

The configuration for the Payer Name Control is described in two sections:

  • Configuring the Payer Name Control
  • Using the Payer Name Control in Govern

Configuring the Payer Name in the Business Entity Designer (BED)

This section is for informational purposes. There are no required steps.

The following attributes are included in the Payer Name custom control:

  • NA_ID
  • PAYER_NAME
  • ARIDLIST

ARIDLIST is a calculated field that provides the list of A/R IDs for the last payers.

Configuring the Payer Name in the OpenForms Designer (OFD)

The following configuration is required for the Payer Name. You can set the properties for the following

  • Viewing / Adding the Payer Name Custom Control
  • Defining the Actions

Viewing / Adding the Payer Name Custom Control

To view the payer name custom control properties:

  1. Launch the OpenForms Designer (OFD).
  2. Open a form that includes the Payer Name custom control, such as ARLockbox (AR036).
    Alternatively, open the form to which you want to add this control.
  3. Select the entity, such as Lockbox Detail, that contains CC_PayerName_Control.
    Alternatively, open the entity to which you want to add this control.
  4. Expand the first Misc. in the Properties explorer.
  5. Click the ellipsis button in the Action parameter.
  6. Ensure that MsGovernOpenFormsCustomControl.dll is selected in the left column.
  7. Select CC_PayerName_Control is selected in the right column.
  8. Click OK on the Extension Selector.

Defining the Actions in the OFD Property Explorer

The properties in this section are used to define the actions that are triggered by the Payer Name custom control. These properties are used to add options to the Payer Name menu in Govern. There are a maximum of three options:
The menu appears when you click the ellipsis button in the Payer Name parameter on the Govern user form.
To define these properties:

  1. Expand Properties > Misc in the Property Explorer.
  2. Define the properties as described under the following headings:
  3. Click Save on the OpenForms Designer after completing the actions to save the modifications.

Creating Names

  • CanCreateNames: Select this option to add the New Name option to the Payer Names menu on the Govern form. This option is required for the FastNameCreation and SelectedFormNameinProfile options.
  • Deselect this option to remove the New Name option from the menu. Note, the new payer name option is independent.

Creating Payer Names

  • Select the CanCreatePayerNames option to add the New Payer Name option to the Payer Name menu. When this option is selected, you can create a new payer name on the fly.
  • Deselect this property to remove the option from the menu.
NOTE: The user can enter a payer name on the form, only if the Payer Name option appears in the pop-up menu.
Otherwise, if this option is not displayed, the parameter is disabled.

Searching for Names

  • Select CanSearchExistingNames: to add the ability to search for a name in the Govern database. The Search appears in the Payer Name menu on the Govern form, when you click the ellipsis button.
  • Deselect this option to remove the search option and functionality.

Adding a Header

  • Enter text in the Control Header parameter.
    The text you enter appears on the form above the custom control in Govern. Payer Name is the default.

Creating a Name Before Saving the Record

  • Select FastNameCreation to open the Name and Address form when the user selects New Name in the Payer Name field on the Govern user form. A scenario follows. This is recommended for Cash Collection. If this option is selected, CanCreateNames must be selected, as well.
  • Deselect this option if you do not need to open the Name and Address form directly. This is recommended for the Lockbox.

Opening a Form in Modal Mode

  • OpenFormAsModal: Select this option to open the Name and Address from in Modal Mode.
  • The modal form opens in a secondary window.
  • The focus is on the modal form. No actions can be performed on other forms until the modal form is closed.
  • Deselect the OpenFormAsModal option if you want to open the Name and Address form as a standard user form in Govern.

Adding a User Form

SelectedFormNameInProfile: Select the user form from the that you want to open when the user clicks New Name. Typically, this is the Name and Address form.

Adding the Search Group and Style

  • SelectedSearchGroup: Select the Search group to launch from the Payer Name > Search option.Typically, this is the Name Search.
  • SelectedSearchStype: Select the Search style to launch from the Payer Name > Search option.
  • For example, if you selected the Name Search as the Search Group, you could select the Name ID, naNameID, as the search style.

Alternatively, leave this option blank to display all the name search styles in the list.

Using the Payer Name Control in Govern

For the examples in this section, the Payer Name Control is added to the A/R Lockbox. Possible actions include:
Selecting the

  • Searching for an Existing Name
  • Creating a Name and Address After Saving the Record
  • Creating a Payer Name On the Fly
  • Creating a New Name and Address Before Saving the Record
  • Opening the Name and Address form in Modal Mode

The required properties for each action are listed.


What’s New

6.0 Payer name will now be recorded in CC_MASTER_PAYOR_NAME instead of NOTES.
6.0 The Mailing index Owner of Record is no longer used as a default

Related Topics


101-ar-fea-021


0 votes, average: 0.00 out of 50 votes, average: 0.00 out of 50 votes, average: 0.00 out of 50 votes, average: 0.00 out of 50 votes, average: 0.00 out of 5 (0 votes, average: 0.00 out of 5)
You need to be a registered member to rate this.
Loading...

Road Map

Govern Road Map

Road Map information

The Govern suite of applications is regularly being improved upon. Modules and applications are enhanced based upon user requirements and feedback. Govern development is under the direction of R&D and the Govern Road Map offers a insight to the benchmarks, direction, and vision, for development.

NOTE: The Govern Road Map is subject to changes.

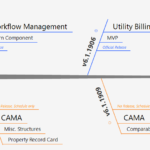
Click the image below to view the Road Map that was updated August 9, 2018For further details please contact Govern R&D. If you have access to Confluence click here.


Roadmap Changes (2018/06/28)

  • CAMA
    • M&S: v1811 to v1911
    • Misc Structure: v1803 to v1903
    • Comparable Sales: v1806 to v1909
  • Utility Billing
    • v1809 to v1906
  • Special Assessment
    • v1903 to v1911
  • Workflow
    • eGovern: v1803 to v1811
  • Not Scheduled
    • CAMA Batch Update
    • Excise Tax Module
    • eGovern rewrite
    • Workflow for Mobile


Roadmap Changes (2017/09/08)

  • New work
    • v1903
      • CAMA Batch Update
      • CAMA Property Record Card
  • Work removed
    • v1803
      • Inspections reports send to backlog
      • New Scheduling feature completed in v1709, Automatic scheduling send to backlog
  • Special Assessment
    • v1811 to v1903
  • CAMA
    • M&S: v1809 to v1811
  • Utility Billing
    • v1811 to v1809
  • Not Scheduled
    • Excise Tax Module
    • eGovern rewrite


Roadmap Changes (2017/08/04)

  • Workflow Management
    • Inspections Scheduling Functions: v1706 > v1803
    • eGovern: v1706 > v1709 > v1803
    • LM Conversion: v1706 > v1709 > v1711
  • Special Assessment
    • v1703 > v1709 > v1811*
  • CAMA
    • Misc. Structures: v1709 > v1803
    • Comparable Sales: v1706 > 1803 > 1806
    • M&S: v1809 (not changed)
  • Utility Billing
    • v1706 > v1803 > v1811
  • Not Scheduled
    • Excise Tax Module
    • eGovern rewrite


Upgrade Plan

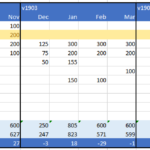
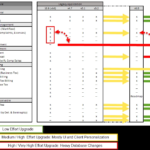
Spreadsheet v1809 Progress Report


Road_Map


0 votes, average: 0.00 out of 50 votes, average: 0.00 out of 50 votes, average: 0.00 out of 50 votes, average: 0.00 out of 50 votes, average: 0.00 out of 5 (0 votes, average: 0.00 out of 5)
You need to be a registered member to rate this.
Loading...

Installation Scripts

Installation Scripts

Overview

The following is a list of scripts designed to be executed in MS SQL SERVER.
Intended for Administrators.

Table Change Event Script

Script Name: CreateCleanupJobForRecentTableChanges
Version 6.0 and Version 6.1
System Administrator Rights are needed
Will be launched during the Verify Database Process. An error will be displayed if the user does not have SysAdmin rights in SQL Server.

Read More...

Script Name: CreateCleanupJobForRecentTableChanges:
IF EXISTS (SELECT job_id
FROM msdb.dbo.sysjobs_view
WHERE name = N’GV_CLEANUP_RECENT_TBL_CHANGES’)
EXEC msdb.dbo.sp_delete_job @job_name=N’GV_CLEANUP_RECENT_TBL_CHANGES’; DECLARE @dbName as sysname;

DECLARE @jobName as varchar(100);
DECLARE @scheduleName as varchar(100);
SET @dbName = db_name();
SET @jobName = N’GV_CLEANUP_RECENT_TBL_CHANGES_’ + @dbName;
SET @scheduleName = N’GV_CLEANUP_RECENT_TBL_CHANGES_EVERY_HOUR_’ + @dbName;

IF EXISTS (SELECT job_id
FROM msdb.dbo.sysjobs_view
WHERE name = @jobName)
EXEC msdb.dbo.sp_delete_job @job_name = @jobName;

EXEC msdb.dbo.sp_add_job
@job_name = @jobName,
@description = N’Govern job to cleanup the table USR_RECENT_TBL_CHANGE.’ ;

EXEC msdb.dbo.sp_add_jobstep
@job_name = @jobName,
@step_name = N’Delete records older than 1 hour.’,
@database_name = @dbName,
@command = N’DELETE FROM usr_recent_tbl_change WHERE change_date < GETDATE() – (1.0/24)’;

EXEC msdb.dbo.sp_add_schedule
@schedule_name = @scheduleName,
@freq_interval = 1,
@freq_type = 4,
@freq_subday_type = 8,
@freq_subday_interval = 1;

EXEC msdb.dbo.sp_attach_schedule
@job_name = @jobName,
@schedule_name = @scheduleName;

EXEC msdb.dbo.sp_add_jobserver
@job_name = @jobName;


100-Installation-Scripts


0 votes, average: 0.00 out of 50 votes, average: 0.00 out of 50 votes, average: 0.00 out of 50 votes, average: 0.00 out of 50 votes, average: 0.00 out of 5 (0 votes, average: 0.00 out of 5)
You need to be a registered member to rate this.
Loading...

Business Entity Designer (BED)

BED60_Start_Icon_Big.png  Business Entity Designer (BED)

Overview

The Govern Business Entity Designer (BED) is used for setting up the business models, entities, and attributes for the data entry forms in Govern.
The business models contain the business entities. These are mapped to tables in the database. The attributes are mapped to columns. The business models become the user forms in Govern. The entities become the dividers within a form and the attributes become the data entry fields.

In the Business Entity Designer (BED) you can:

  • Build and maintain all the business models for your deployment from one central location.
  • Select the connection key for the deployment.
  • Perform data mapping
  • Create relationships between business models and between business entities
  • Add centralized notes
  • Add queries
  • Add calculated fields
  • Create validation rules


Read More...


What’s New

A new Encryption Mode is included for ACH and other sensitive data in Govern OpenForms v6 and above. This mode uses TripleDES encryption. In Govern for Windows, there are two encryption modes, now labeled Legacy3 and Legacy5. The recommended versions are as follows:

  • If you are running Govern OpenForms v6.1 and above, TripleDES is used for all encryption. Select this mode for all encrypted values.
  • If you are running Govern OpenForms v6 and to remain backwardly compatibles with Govern for Windows, you need to use either Legacy3 or Legacy5 encryption.

The IsEncrypted property in previous versions of the Business Entity Designer is now named Encrypted Mode. IsEncrypted had two values, True or False.
Encrypted Mode has the following values:

  • None: This is the default for most attributes.
  • TripleDES: Select this option if you are running Govern OpenForms v6.1 or higher.
  • Legacy3: This is the default encryption in Govern for Windows for ACH Information. Select this encryption mode if you are running Govern OpenForms v6 and need to remain backwardly compatible with Govern for Windows.
  • Legacy5: This is the default encryption in Govern for Windows for all other sensitive information in Govern for Windows. Select this encryption mode if you are running Govern OpenForms v6 and need to remain backwardly compatible with Govern for Windows.

Documentation

The Govern Business Entity Designer 6.0 guide provides the information and procedures for selecting a datasource, building business models, mapping entities and attributes, and creating validation rules.

Related Topics


104-all-BED


0 votes, average: 0.00 out of 50 votes, average: 0.00 out of 50 votes, average: 0.00 out of 50 votes, average: 0.00 out of 50 votes, average: 0.00 out of 5 (0 votes, average: 0.00 out of 5)
You need to be a registered member to rate this.
Loading...