Configuring Batch Process Definitions
Configuring Batch Process Definitions describes the following topics:
Batch Process Definitions User Interface
This section provides a tour of the Batch Process Definitions UI. The interface is comprised of a treeview, the definition form, and a secondary window for creating the menus and submenus or categories.
To access the Batch Process Definitions form:
- Launch Govern New Administration (GNA).
- Select Batch Process > Definitions.
Once you create menus and define batch processes, the selected items are listed in a treeview on the left of the form. You can display or hide the treeview according to your preference.
About Batch Process Definitions
You can view, add, or modify a batch process definition, as described later in this section.
To display or hide the English and French long and short descriptions, click on the arrow beside the text box at the top of the form.
About the Menu Manager
The Menu Manager form is used for creating the menus and submenus for organizing your batch process definitions in Govern.NET.
To access the Menu Manager
- Launch Govern New Administration (GNA).
- Select Batch Process > Definitions.
- Click the ellipsis button beside the Category text box.
If categories are already created, they are listed on the left. You can expand a category to view secondary levels if they exist. The name of selected menu is displayed on the right. You can expand the name to view the English and French short and long descriptions.
Creating a Batch Process Category
The first step is to create categories for your batch processes. The categories are used for displaying the batch processes in the Govern .NET menu. Create as many categories as required in order to facilitate user input.
To create a Batch Process:
- Launch Govern New Administration (GNA).
- Select Batch Process > Definitions.
- Click the ellipsis button beside the Category text box. This opens the Menu Manager.The Menu Manager is used for creating categories for the batch processes. You can have multiple levels. For example, you could group batch processes by module, such as: Accounts / Receivable, Tax Billing, and Mass Appraisal. Then, you could add another level that groups processes according to when they need to be run; i.e., daily, monthly, or yearly. You can create any type of category that is useful for your organization.
- Enter a name for the category in the text box at the top right. This is automatically added to the English Long Description field.
- Click the button to the left of the text box where you entered the category name. This expands a menu with additional descriptions.
- Add an English Short Description and French Short and Long Description as required. These fields are optional.
- Click Save to add the category to the menu.
If you click the Select button without saving your new category, a confirmation message appears:
Deleting a Menu Category
To delete a menu category from the Menu Manager:
1. Launch Govern New Administration (GNA).
2. Select Batch Process > Definitions.
3. Click the ellipsis button beside the Category text box to open the Menu Manager.
4. Expand the applicable menu.
5. Select the category from the Menu list on the left.
6. Click the Delete button in the menu at the top right.
7. When the confirmation message appears, click Yes to delete the record.
Selecting a Category for the Batch Process
You need to define the processes under the categories to which they are assigned and will appear in Govern. Before defining a batch process, select the menu category where it will be saved.
To select a Batch Process:
- Launch Govern New Administration (GNA).
- Select Batch Process > Definitions.
- Click the ellipsis button beside the Category text box to select the category for the batch process. This opens the Menu Manager.
- Expand the root menu to display the submenus.
- Select the applicable submenu or category.
- Click the Select button .
The root menu and all submenus are displayed in the Category text box and in the Parent Path text box. The existing batch processes are listed on the left.
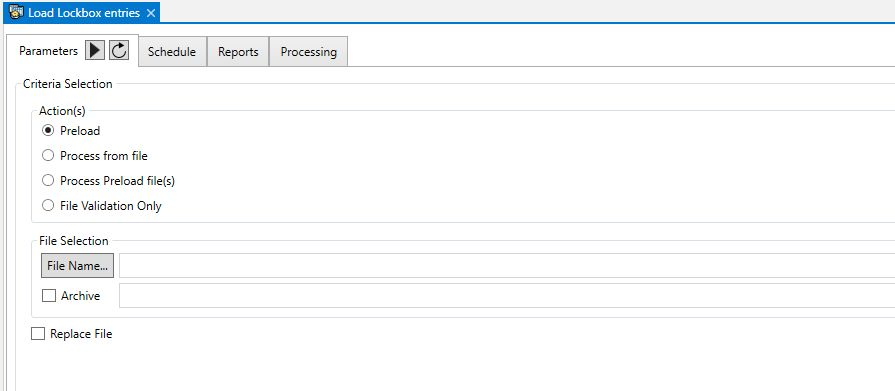
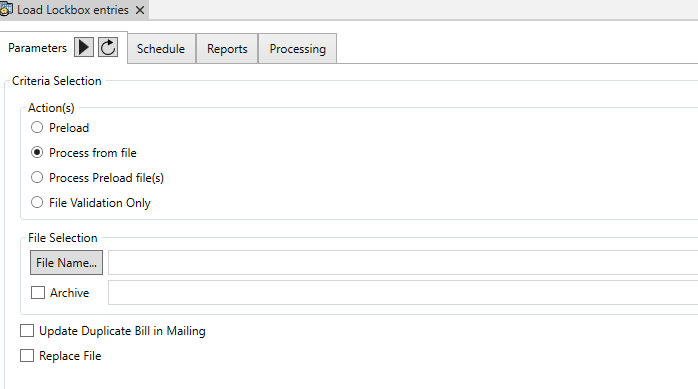
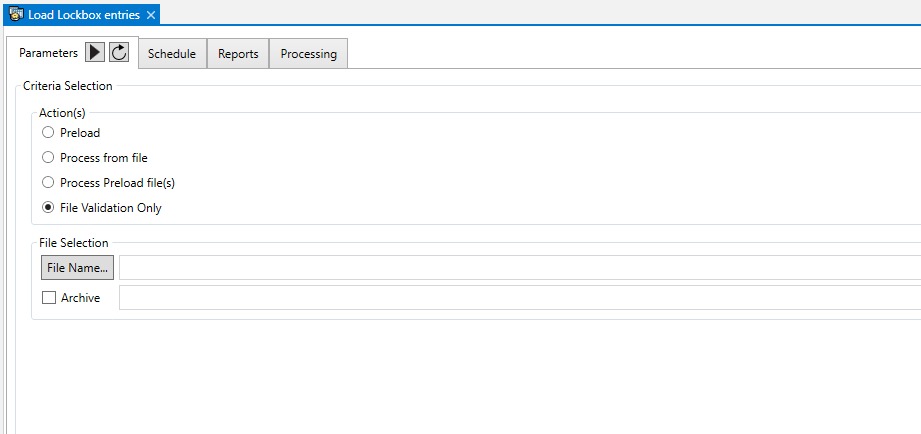
Defining a Batch Process
Use the following process to name the definition and to associate it with a Govern Batch process.
| NOTE: You need to define the processes under the category to which they are assigned and will appear in Govern. |
To define a Batch Process:
- Select the category where you are defining the process as described under Selecting a Category for the Batch Process. The batch processes already defined for the category are displayed in the treeview on the left.
- Click the New button.
- Enter a code for the new batch process definition. This is a required field.
- Select a Govern batch process from the Process drop-down list. This is a required field.
- Enter a name for the record in the text box at the top right. This is automatically added to the English Long Description field.
- Click the button to the left of the text box where you entered the name. This expands a menu with additional descriptions.
- Add an English Short Description and French Short and Long Description as required. These fields are optional.
- Click the Save button to add the category to the menu.
If you click the New button without saving your modifications, a confirmation message appears:
Defining the Transaction Type
The Govern batch processes can be run synchronously or asynchronously. If they are run synchronously, they are run on the same server. If run asynchronously they are run on multiple servers at the same time.
Select Synch or Asynch as required. For processes with multiple transactions, it is recommended to use asynchronous processing as this spreads the load over multiple servers and makes for faster processing time.
Pool #: For Asynchronous processes only, enter the maximum number of transactions to be handled by the client servers at any one time.
This works as follows: If you are running asynchronous batch processing, there is one master server that manages all the transactions and is responsible for sending them to the client servers. The value In the Pool # field indicates the maximum number of transactions to send out by the master server at any one time.
Scenario: Running a Batch Process Asynchronously
The following scenario illustrates how asynchronous batch processing works.
The parameters are as follows:
- Master server: one
- Client servers: five
- Transactions: 50,000
- Pool #: 50
The master server sends out the first 50 transactions to the client servers. Each server is responsible for ten transactions. As soon as a server completes one transaction, the master server sends it another. This continues until all transactions have been processed. However, there are never more than 50 transactions being handled by the client servers at any given time.
Defining the Transaction Mode
Select one of the following transaction modes for the process.
- Break If One Transaction Failed: the process terminates when the transaction fails.
- Roll Back If One Transaction Failed: the process terminates when a transaction fails and all the transactions that were completed are cancelled. Computations are returned to the starting point.
- Continue If One Transaction Failed: Continue to run the process even if a transaction fails.
Adding a Report
Use the following procedure to associate one or more reports with the selected batch process.
To add a report: to the batch process:
- Launch the Batch Process Definitions form.
- Select the category for the process as described under Selecting a Category for the Batch Process.
- Select the batch process from the treeview on the left.
- Click Add Reports.
- Select one or more reports from the Choose the Reports menu.
TIP: You can select multiple reports using the left mouse button.
- Click Select Reports.
The selected reports are displayed in the List of Reports text box. The parameters for the report are displayed in the Report Parameters list box.
The List of Parameters text box displays the parameters that can be included in the report and that can be used to build an external report; for example, these could include Date To and Date From fields. The purpose is to give you the exact reference and wording of these fields.
Deleting a Batch Process Definition
To delete a batch process:
- Launch the Batch Process Definitions form.
- Select the category for the process as described under Selecting a Category for the Batch Process.
- Select the batch process from the treeview on the left.
- Click the Delete button .
Adding Batch Processes Definition to Govern
When you have defined your batch processes, you need to add them to Govern.NET. In order to do this, you need to launch the Govern Security Manager and synchronize your new processes between GNA and Govern. Then, you need to assign access permissions.
Synchronizing Batch Process Definitions
When you have synchronized your new batch process definitions, they appear on the Govern.NET menu.
To synchronize the new batch processes:
- Launch the MSGovern Security Manager (GSM).
- Select your database connection key.
- Right-click on Applications and select Synchronize menu from the dropdown list. A confirmation message appears.
- Click Yes on the confirmation message.
Permissions and Batch Processes
Use the following procedure to assign access permissions to the new batch process definitions. You can grant permissions by batch process, batch process menu, or by batch process definition.
- Launch the MSGovern Security Manager (GSM).
- Select your database.
- Expand Applications > MSGovern.NET > Batch Process > Batch Process.
- Continue to expand the menus until you are the level where you want to grant permission.
- Right-click on the item that you want to secure.
- Define the permissions and exclusions as required and as described in the Govern Security Manager.